

Table of Contents
The render that lost the project didn’t fail on materials. It failed on time.
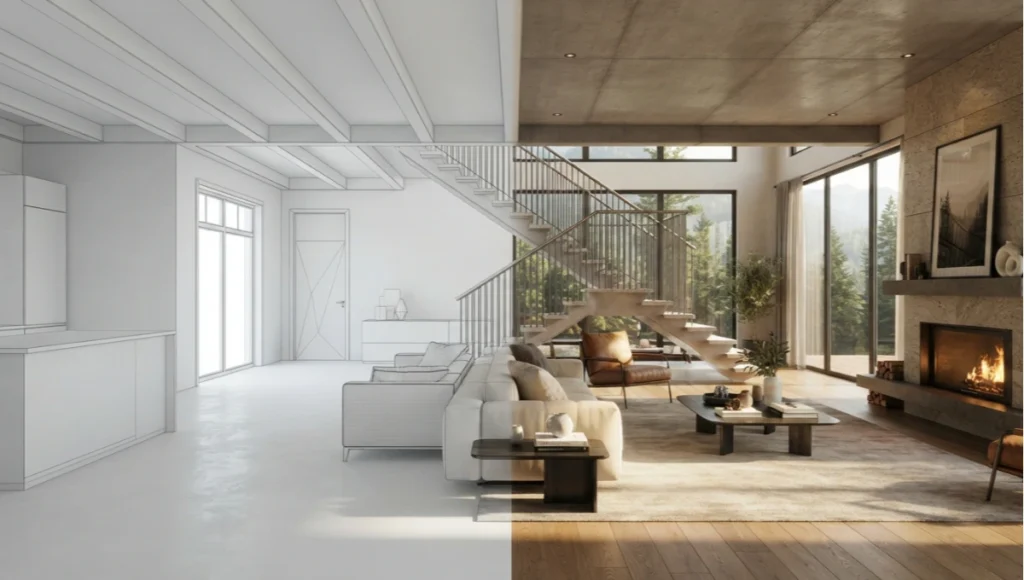
In 2026, the architectural visualization market is no longer impressed by photorealism alone. Every mid-tier studio now delivers 4K interior renders. The actual differentiator is iteration speed — how fast you can move from a client brief to a decision-ready image, revise it within 24 hours, and deliver a sequence of scene variations that make the client feel they already live inside the space. The studios winning premium contracts are not the ones with the most powerful hardware. They are the ones that have built a SketchUp interior rendering pipeline tight enough that the gap between geometry and final deliverable is measured in hours, not days.
This is where the SketchUp workflow earns its reputation — and where most practitioners are leaving quality on the table. The default SketchUp rendering behavior, without a tuned pipeline, produces output that sits visually mid-way between a technical drawing and a photograph. That gap — the 40% difference between a passable render and a client-closing image — is not a hardware problem. It is a workflow problem. And it is solvable.
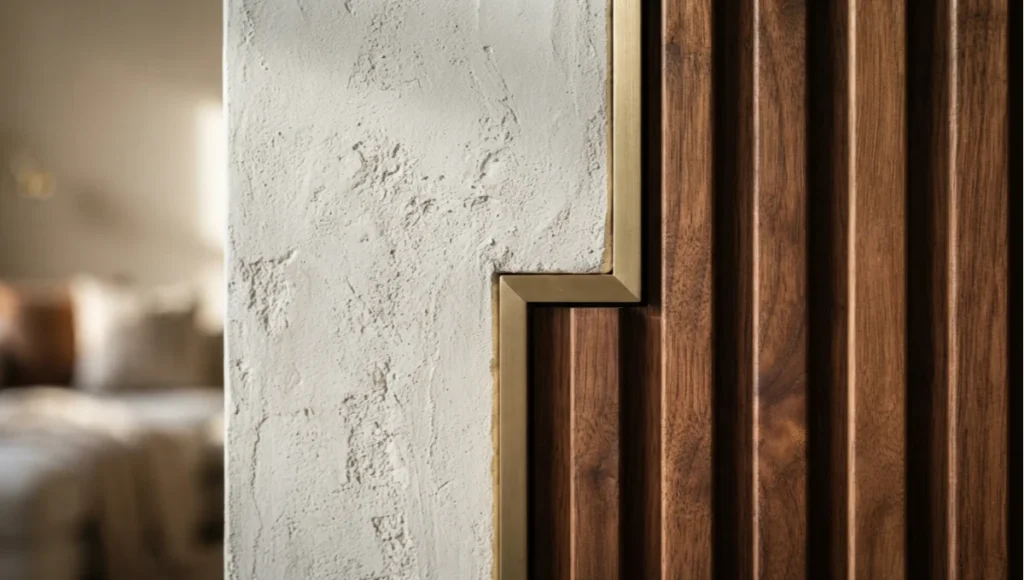
This article is not a beginner’s guide. It is a production-grade breakdown of how professional visualization studios in 2026 use SketchUp interior rendering to move from model cleanup to composited final output with minimum wasted cycles, maximum material accuracy, and the kind of atmospheric depth that makes a client sign off on the spot.
Nuvira Perspective
At Nuvira Space, we do not evaluate SketchUp interior rendering as a software task. We evaluate it as a communication instrument. The render is not the end of a modeling process — it is the opening argument in a client relationship. When a potential client opens an image in 2026, they are not asking ‘is this realistic?’ They are asking ‘does this feel like somewhere I want to exist?’ That distinction changes everything about how you set up a scene.
Our Visual Lab’s interior rendering philosophy is built around three non-negotiables. First: every scene must be lit from physical first principles, not from instinct. If the geometry doesn’t allow for the light behavior you want, change the geometry. Second: material definition must be established before any GI pass is computed. Materials are not decoration — they are the physical data that the rendering engine needs to solve light behavior. Assign placeholder materials and your GI solution will be wrong. Third: post-production is not optional. A raw render, regardless of engine, is unfinished. The difference between a studio-grade image and an amateur output is always visible in the composite.
The studios we benchmark against — those producing visualization work for high-end residential, hospitality, and retail projects — all share one operational reality: their SketchUp pipeline has been engineered, not assembled. Every stage from model prep to final JPEG export has a defined protocol, a quality gate, and a time budget. That is the standard this article is written to.
Step-by-Step Workflow & Core Features
The professional SketchUp interior rendering pipeline in 2026 runs across 6 distinct production phases. Collapsing any of them accelerates timelines on paper and destroys quality in output. Run them in sequence.
Phase 1: Model Hygiene & Geometry Preparation
Before a single render setting is touched, your model must be geometrically clean. Interior rendering engines compute light bounces against every piece of geometry in the scene. Reversed faces, open edges, and redundant geometry are not cosmetic problems — they are rendering noise sources that your GI engine will attempt to solve, adding computation time with no visual return.
- Purge all unused components, materials, and layers via Window → Model Info → Statistics → Purge Unused. A typical uncleaned imported SketchUp file carries 30–50% dead data.
- Verify face orientation throughout. In V-Ray, reversed faces render as pure black; in Enscape, they simply vanish. Use monochrome shading in SketchUp’s display styles to audit all faces before export.
- Set model units to millimeters and verify real-world scale before configuring any lighting. Interior GI calculations at the wrong scale produce physically impossible light behavior — no engine setting fixes this.
- Remove all 2D face-me components from the model before rendering. Replace them with 3D proxy objects that your rendering engine supports natively. For V-Ray, use V-Ray Proxy; for Enscape, use linked Enscape assets.
- Keep polygon budgets under 2,000,000 for a single interior scene. High-polygon furniture is the most common cause of scene slowdowns. Use subdivision proxy workflows rather than importing raw high-poly mesh.
Phase 2: Material Definition with PBR Accuracy
Physically-based rendering requires physically-accurate material data. In 2026, the standard for professional interior visualization is PBR materials with a minimum of 4 texture maps per material: Diffuse/Albedo, Roughness, Normal, and Reflection/Metallic. Applying a simple color or a flat photo texture is not sufficient for scenes where clients will zoom in on material details.
- Concrete and plaster: Roughness values between 0.7 and 0.9. Use a subtle Normal map at 0.3–0.5 intensity to simulate micro-surface texture without appearing fabricated.
- Timber and wood finishes: Reflection values between 0.05 and 0.15 depending on lacquer level. Use anisotropic reflection rotation to simulate wood grain directionality on polished surfaces.
- Glass: IOR (Index of Refraction) set to 1.52 for standard float glass. Never use a simple transparency slider — glass without proper IOR produces unrealistic light behavior at all incident angles.
- Fabric and upholstery: Enable SSS (Subsurface Scattering) at low values (0.05–0.10) for organic materials. Fabric without SSS reads as plastic under direct lighting.
- Marble and stone: Use Reflection Glossiness of 0.85–0.95. Add a Bump map at 0.2 intensity — polished stone still has micro-surface variation that prevents the mirror-flat look that marks amateur material setups.
Phase 3: Lighting Architecture — The GI Framework
Interior lighting is the single most complex technical domain in the SketchUp rendering workflow. The core challenge: interior spaces receive very little direct light relative to their visual area. Most of the illumination you see in a well-rendered interior is indirect — bounced from walls, ceiling, and floor surfaces. That behavior is governed by your Global Illumination engine settings.
GI Engine Configuration (V-Ray)
- Primary GI Engine: Brute Force. Set Min Subdivs to 8, Max Subdivs to 32. Brute Force produces the most accurate indirect illumination for interior scenes with multiple bounce sources.
- Secondary GI Engine: Light Cache. Set Subdivs to 1500 for production renders. Light Cache handles secondary bounce light economically, preventing exponential render time growth.
- Noise Threshold: 0.005 for production output. Do not attempt to resolve dark interior noise by raising GI quality before diagnosing the lighting setup — 80% of interior noise problems are lighting problems, not GI settings problems.
- Ambient Occlusion: On, Radius 25cm, Amount 0.8. AO adds contact shadow depth to material junctions, which is the single most visible marker of realism in interior close-ups.
- For IES (photometric) interior lights: import manufacturer IES profiles rather than using synthetic V-Ray spotlights. IES data encodes the actual beam distribution of real luminaires — the visual difference at 3–4 meters render distance is immediately obvious.
Phase 4: Camera & Composition Setup
Camera settings in SketchUp rendering are not aesthetic choices — they are physical parameters that determine how your rendering engine interprets scene exposure. Incorrect camera settings produce over-exposed or flat renders that no amount of post-production can fully recover.
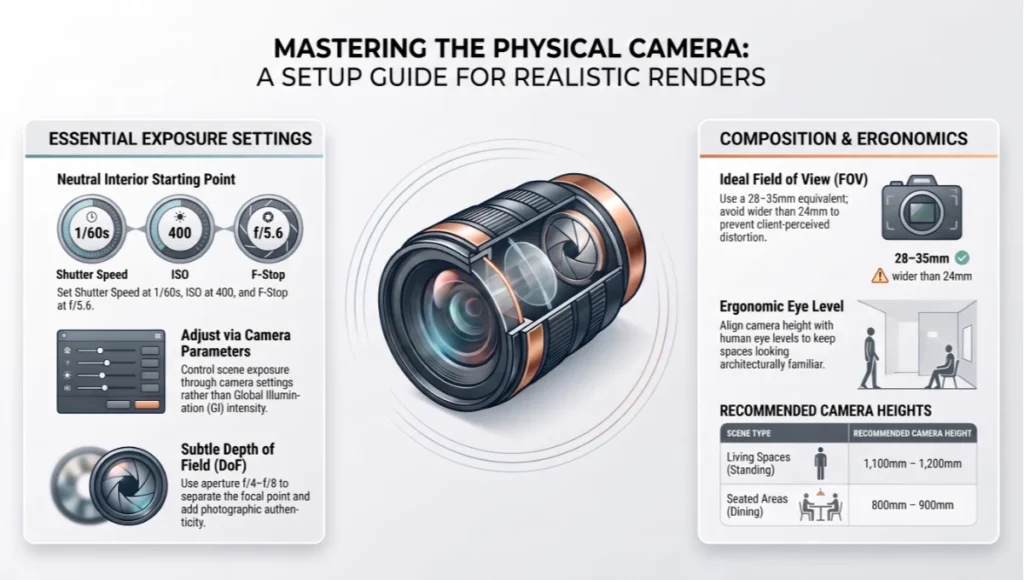
A SETUP GUIDE FOR REALISTIC RENDERS
- Use a physical camera model. Set Shutter Speed at 1/60s, ISO at 400, F-Stop at f/5.6 as a neutral interior starting point. Adjust exposure via these parameters, not via GI intensity — the physical camera model is more predictable and produces consistent results across scene variations.
- Field of view for interior stills: 28–35mm equivalent. Wider than 24mm produces distortion at corners that clients read as ‘wrong’ even when they cannot identify why.
- Camera height: 1,100mm–1,200mm (human standing eye level) for living spaces; 800mm–900mm for seated areas like dining rooms. Deviating from ergonomic eye height makes spaces look architecturally unfamiliar.
- Enable Depth of Field at a subtle level: aperture f/4–f/8, focus point on the primary furniture grouping. DoF communicates photographic authenticity and separates the focal point from background elements.
Phase 5: Render Output & Pass Extraction
A production-grade SketchUp interior rendering workflow never outputs a single merged image file. Render passes give your post-production pipeline independent control over every visual component of the scene. This is not an advanced technique — it is the professional baseline.
- Beauty Pass: The complete, fully composited render as the reference layer.
- Diffuse Pass: Raw material color without lighting influence. Used to color-correct materials independently in post.
- Reflection Pass: Isolated reflection data. Allows boosting or dampening surface reflections globally without re-rendering.
- Lighting Pass: Direct illumination only. Enables exposure correction on lit areas without affecting shadow depth.
- Shadow Pass: Isolated shadow data. Allows independent control of shadow softness and density in post-production.
- Z-Depth Pass: Distance data from camera. Required for adding depth of field in post rather than computing it in the render engine — post DoF is 10–20x faster.
- AO Pass: Isolated Ambient Occlusion. Blended in post at Multiply mode, typically at 60–80% opacity, for contact shadow control.
Phase 6: Post-Production in Photoshop
Post-production is not beautification. It is the final stage of light simulation — the analytical layer where you apply artistic decisions that the render engine’s physics-based output cannot make on its own: mood, atmosphere, narrative. A professional post-production workflow for SketchUp interior rendering follows a fixed compositing order.
- Layer 1: Beauty Pass as Background. Convert to 16-bit before any adjustment. Never work on an 8-bit render in post — you lose color depth on every operation.
- Layer 2: AO Pass at Multiply, 70% opacity. This immediately adds contact depth to all material junctions.
- Layer 3: Reflection Pass at Screen, 20–30% opacity. Subtly intensifies surface reflectivity without global exposure shift.
- Layer 4: Camera Raw Filter on the merged composite. Adjust Exposure +0.3 to +0.5, lift Shadows +15, reduce Highlights -10 to recover blown window detail. This single step closes 60% of the gap between a raw render and a finished image.
- Layer 5: Color grade via Curves. Add warmth to midtones (RGB curve S-shape with slight lift in Red/Yellow), cool the highlights slightly (reduce Red in highlights). Interior renders without color grading read as technically correct but emotionally flat.
- Layer 6: Bloom effect. Create a duplicate layer, apply Gaussian Blur at 8–12 pixels, set to Screen at 15–25% opacity. Apply only to luminous areas (windows, pendant lights) via luminosity mask.
- Layer 7: Film grain at 1.5–2.0% intensity. This is the most counter-intuitive step and the one most practitioners skip. Film grain converts digital precision into photographic authenticity.
- Final step: output at 300dpi minimum for print, 150dpi for digital client delivery at 4K (3840×2160) resolution.
Comparative Analysis: Nuvira Workflow Vs. Industry Standard
The default industry approach to SketchUp interior rendering in most mid-size studios follows a simplified, single-output pipeline: model → assign materials → set up a sun/sky light → hit render → export JPEG. That pipeline produces work that is technically adequate and commercially mediocre. Here is where the gap lives.
Lighting Setup Comparison
- Industry Standard: V-Ray Sun + Sky system as primary light source, adjusted intensity until the scene looks acceptable. Result: natural daylight renders that are technically correct but lack the controlled atmospheric depth of a directed lighting setup.
- Nuvira Protocol: V-Ray Sun + Sky as environmental base, supplemented with HDRI dome at 20–30% influence to fill shadow areas, IES luminaires for all artificial sources, and targeted Rectangular Lights placed 100–200mm inside window frames to simulate light scatter from window casings. Total light sources per interior scene: 6–12 depending on room complexity. Render time differential: +15–25%. Quality differential: immediately visible.
Material Assignment Comparison
- Industry Standard: SketchUp native materials or basic V-Ray materials with Diffuse color and a Reflection value. No Normal maps, no IOR-accurate glass, no SSS.
- Nuvira Protocol: Full PBR material library built on Chaos Cosmos assets, supplemented with custom materials from Quixel Megascans for hero surfaces (primary floor material, dominant wall finish, featured joinery). Every material is test-rendered at 400×400 in a neutral grey sphere environment before scene application. Material QC step adds 45–90 minutes per scene. Render quality difference: the gap between ‘looks like a render’ and ‘looks like a photograph’.
Real-Time vs. Production Rendering
In 2026, the real-time rendering engines — D5 Render, Enscape, Lumion — have closed the quality gap with V-Ray for interior work at a speed advantage of 15–30x. For concept presentations and client design-development meetings, real-time rendering via D5 Render’s LiveSync with SketchUp is now the professional standard: changes to SketchUp geometry propagate to the D5 viewport in under 500ms, and a 4K interior still exports in under 3 minutes. For final delivery images — competition entries, publication-quality stills, marketing renders for development projects — V-Ray remains the quality benchmark. The professional protocol in 2026 is not either/or: use Enscape or D5 Render for the design development phase, switch to V-Ray for final delivery.
For a deeper analysis of real-time rendering engine comparisons relevant to SketchUp workflows, the Nuvira Visual Lab has published dedicated benchmarks. See also: Lumion vs Enscape vs D5 Render Quality Comparison 2026, Real-Time Ray Tracing Architecture: Speed vs. Quality in 2026, and 5 Expert Tips: Architecture Photoshop Workflow Mastery.
Speculative / Internal Concept Study — “Seladon Loft” by Nuvira Space
Project Overview
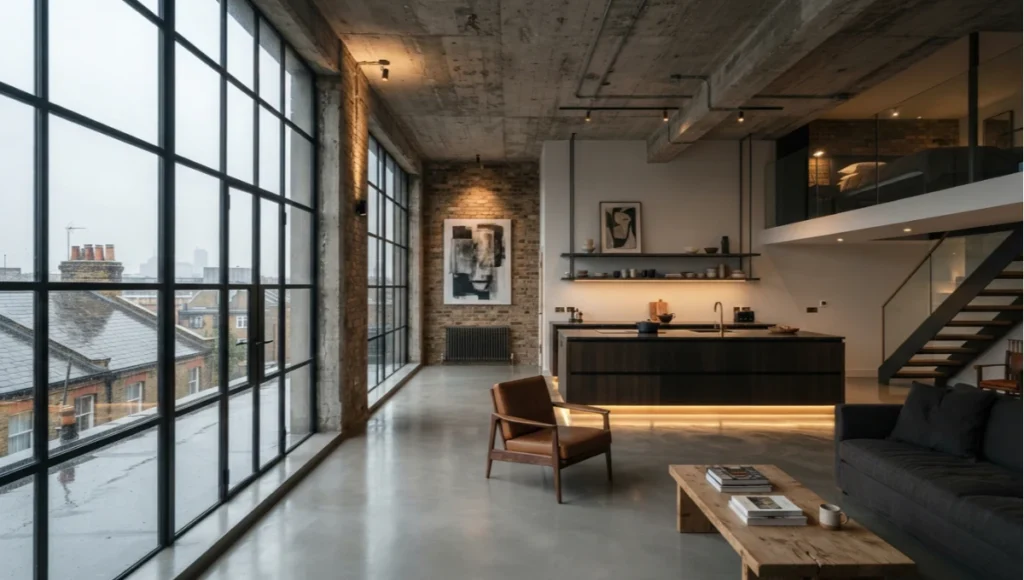
The Seladon Loft is a speculative interior visualization study developed by Nuvira Space’s Visual Lab to stress-test the full SketchUp interior rendering pipeline described in this article. The brief was deliberately challenging: a 180m² converted industrial loft in a Northern European climate context, featuring an open-plan living and workspace with exposed concrete ceilings at 4.2m height, floor-to-ceiling steel-framed glazing on the north facade, polished microcement floors, and a material palette limited to 6 hero surfaces. The rendering challenge: indirect north light, extreme ceiling height producing deep shadow zones at floor level, and an all-neutral color palette where material micro-texture was the primary visual interest.
Design Levers Applied
Lighting Architecture
- North facade glazing produced no direct sun penetration at the reference time of 14:00 in November. Compensated with 3 × Rectangular Lights at 800mm width inside window frames, set to 2,800K color temperature at 80% intensity — simulating overcast sky scatter rather than direct sunlight.
- Exposed concrete ceiling at 4.2m required 6 × recessed IES downlights at 3,000K to fill the floor zone without introducing the ‘surgical lighting’ look of evenly-spaced ceiling fixtures.
- Shadow zones behind the kitchen island (a 1,200mm floor-standing block) were resolved with 2 × horizontal strip lights at 2,700K placed at 150mm above floor level behind the island toe kick — a practical technique borrowed from hospitality visualization that reads as ambient glow at render scale.
Material Configuration
- Exposed concrete ceiling: Roughness 0.88, Bump map at 0.6 intensity using a custom 4K concrete formwork texture. The deep ceiling required maximum surface micro-variation to read as physically distinct from the wall plaster.
- Microcement floor: Reflection Glossiness 0.72, IOR 1.45, subtle Anisotropy 0.2 to simulate the directional polish of a machine-applied cement finish.
- Steel window frames: Metallic 1.0, Roughness 0.15, no Diffuse color contribution. Pure physically-correct metal at this scale reads as dark against the north sky — intentional.
- Merino wool sofa upholstery: SSS enabled at 0.08 scatter radius, Roughness 0.95, no reflection. Wool at render scale reads optically flat — this is correct and intentional.
Transferable Takeaway
The Seladon Loft study produced one operational insight that applies to every high-contrast, north-lit interior: the GI engine will always underexpose deep floor zones when the primary light source is diffuse north sky. Do not solve this by raising GI intensity globally — this lifts all zones and destroys the tonal contrast that makes the space read as physically real. Solve it by adding low-level targeted fill sources at floor height (150–300mm), set to a color temperature 200–300K warmer than the primary sky source to simulate reflected warmth from floor materials. This 2-hour lighting adjustment changes the perceived quality of the render more than any GI settings modification.
Intellectual Honesty: Hardware Check
The workflow described in this article is production-tested and correct. It will not perform equally on all hardware configurations. A transparent hardware assessment:
- CPU rendering (V-Ray CPU): Minimum viable spec for production interior rendering in 2026 is a 12-core processor (AMD Ryzen 9 7900X or Intel i9-13900K), 64GB RAM, and NVMe SSD storage for texture streaming. A complex interior scene with full GI, 8 passes, and 4K output will render in 45–90 minutes on this spec. Below 12 cores, production timelines become commercially unviable for multi-scene projects.
- GPU rendering (V-Ray GPU / RTX): NVIDIA RTX 4080 minimum for production quality. GPU render times for the same scene: 8–15 minutes. VRAM requirement: 16GB minimum; scenes with 4K textures across 10+ materials will exceed 12GB VRAM and cause engine fallback to CPU, defeating the speed advantage.
- Real-time engines (D5 Render, Enscape): RTX 3070 is the minimum for smooth real-time preview at 1440p. RTX 4070 is the recommended baseline for clients running real-time walkthroughs during design presentations.
- The honest conclusion: if your hardware predates 2021, the post-production pipeline is your primary quality lever. Invest rendering cycles in fewer, better-configured scenes rather than attempting large scene counts at reduced quality settings.
2030 Future Projection: Where SketchUp Interior Rendering Is Going
By 2030, the phrase ‘setting up a render’ will be operationally obsolete. The current trajectory — visible in V-Ray 7’s Vantage integration, D5 Render’s AI-assisted lighting, and SketchUp’s native rendering evolution — points to a future where the rendering engine adapts in real time to model changes without a setup phase. The visualization pipeline will be continuous rather than discrete: your SketchUp geometry will exist inside a persistent, physics-accurate rendering environment that updates at 60fps as you model.
Material assignment will be largely automated through AI surface recognition — the engine will detect ‘concrete wall’ from geometric context and apply a PBR-accurate material automatically, leaving the artist to make artistic overrides rather than technical specifications. Lighting will be inferred from the architectural program: a residential living room will trigger a different lighting model than a commercial reception, without manual configuration.
The professionals who will lead in this environment are not the ones who understand render settings best — they are the ones who understand architectural space, light, material, and atmosphere well enough to direct and correct an AI-assisted rendering system. The technical knowledge in this article will not be useless by 2030. It will be the baseline fluency needed to evaluate AI output and override it intelligently. Learn the physics now, and the automation becomes a tool you control. Skip the physics, and the automation controls your output quality.
Secret Techniques: Advanced User Guide
These are the techniques that do not appear in YouTube tutorials because they require a production context to understand why they work.
- The ‘invisible wall’ technique: In enclosed interiors with a single viewpoint camera, delete the wall behind the camera entirely and replace it with a V-Ray Dome Light set to the same color temperature as your primary interior light source. This fills the scene from the camera side and eliminates the dark-corner problem in tight spaces without adding visible light fixtures.
- HDRI color bleeding control: Interior HDRI environments emit colored light proportional to the image content. A warm-toned HDRI in a space with white walls produces orange light bleeding across all surfaces. Desaturate your HDRI in the V-Ray Asset Editor to 30–50% saturation to retain the dome shape information (for reflections) while eliminating color contamination on neutral surfaces.
- The 1-frame animation trick: Instead of rendering a still at full quality settings, set up a 3-frame animation and render frame 2. Animation mode activates V-Ray’s pre-pass optimization algorithms (Progressive Path Tracing preprocessing) that are otherwise disabled for stills. Frame 2 of a 3-frame animation consistently produces 12–18% lower noise than an equivalent still render at identical settings.
- Denoising pass timing: Always apply V-Ray Denoiser as a separate post-render element, not during the render. Denoising during render locks your composite options. Denoising in post allows you to apply different denoising strengths to different render passes — full denoising on the Lighting pass, zero denoising on the Reflection pass where sharp detail is critical.
- SketchUp scene tabs as render camera presets: Create one SketchUp Scene tab per camera angle before configuring any render settings. This links camera, style, shadow settings, and layer visibility to a single click — non-destructive camera management for projects with 8–12 interior views.
For deeper technical reference on GI optimization, the Chaos documentation on Global Illumination in V-Ray for SketchUp provides engine-level documentation on the Brute Force and Light Cache configuration parameters referenced throughout this article. For render pass compositing theory, the ArchFine post-production Photoshop workflow guide provides a compatible pass-compositing methodology for Photoshop.
Comprehensive Technical FAQ
For the complete pipeline — engines, capture, materials, hardware, and presentation — see our architectural visualization guide.
Q: What is the best rendering engine for SketchUp interior rendering in 2026?
There is no single best engine — there is a best engine for each phase of the workflow. V-Ray for SketchUp remains the production standard for final-delivery interior stills where material accuracy and GI quality are the primary requirements. D5 Render with LiveSync is the standard for design-development visualization where speed of iteration matters more than ultimate quality. Enscape occupies a middle ground: faster than V-Ray, higher out-of-box quality than D5 for specific material types, and better integrated with BIM workflows. For studios doing 80% residential work: V-Ray + D5 Render as a two-engine pipeline is the 2026 professional standard.
Q: How long does a professional SketchUp interior render take in 2026?
On current professional hardware (NVIDIA RTX 4080, 64GB RAM), a single 4K interior still with full V-Ray GI, 7 render passes, and noise threshold 0.005 renders in 12–25 minutes. CPU-only rendering at equivalent quality on a 16-core workstation takes 60–120 minutes. With post-production (pass compositing, color grading, final output): add 60–90 minutes for a first-time scene, 20–30 minutes for scene variations once the composite template is established. Full project delivery for a 4-view interior presentation: 6–10 hours on a properly configured production workstation.
Q: Can SketchUp Free be used for professional interior rendering?
SketchUp Free (browser-based) does not support third-party rendering plugins and cannot export in formats compatible with V-Ray or D5 Render. SketchUp Pro ($349 USD/year in 2026) is the minimum commercial version required for professional interior rendering workflows. SketchUp Studio ($699 USD/year) adds V-Ray for SketchUp, Scan Essentials for point cloud import, and direct Enscape integration — it is the recommended starting point for studios doing more than 5 rendering projects per month.
Q: What causes dark or underexposed areas in SketchUp interior renders?
Dark interior areas are caused by one or more of the following: (1) insufficient primary light source intensity for the scene’s spatial volume, (2) GI secondary bounces set too low — increase Light Cache Subdivs from 1000 to 1500, (3) window glass material blocking too much light — check IOR and reduce Fog multiplier if present, (4) reversed face normals on walls or ceiling blocking GI penetration, (5) physical camera settings not calibrated — raise ISO from default 100 to 400 before adjusting any GI settings. Diagnose in this order before touching GI quality values.
Q: How do I reduce render noise in V-Ray SketchUp interior scenes?
Render noise in interiors is almost always a lighting problem, not a GI settings problem. Correct sequence: (1) Verify all light sources have sufficient intensity — a common mistake is setting dome lights below 0.5 intensity in scenes where they carry primary fill responsibility. (2) Enable V-Ray Denoiser on the Beauty Pass as a post-render element (not during render). (3) Increase Image Sampler Min Subdivs to 2, Max to 16. (4) If noise persists after steps 1–3, reduce Noise Threshold from 0.01 to 0.005. Never increase GI quality (Brute Force Min/Max Subdivs) as the first response to noise — it multiplies render time without addressing the underlying cause.
Q: Is D5 Render or Enscape better than V-Ray for SketchUp interiors?
D5 Render produces superior material fidelity for glazing, polished concrete, and water surfaces in real-time mode. Enscape’s path-traced mode delivers comparable indirect light accuracy to D5 and has stronger BIM integration with Revit, ArchiCAD, and Rhino workflows. V-Ray remains the reference standard for maximum GI quality in production stills. For a SketchUp-native workflow focused on residential interior presentation, the D5 Render + V-Ray two-engine pipeline is the most productive configuration in 2026: D5 for design development, V-Ray for final client delivery.
Q: What image resolution should SketchUp interior renders be output at?
Minimum resolution for client-facing interior renders in 2026: 3840×2160 (4K) at 150dpi for digital delivery (presentations, websites, PDF reports). For print collateral (brochures, hoardings, competition boards): 4K at 300dpi minimum. For billboard and large-format print: 6K (5760×3240) or higher. Avoid rendering at 1920×1080 for any client-facing deliverable — downscaling from 4K is always available, upscaling from 1080p produces visible compression artifacts that undermine photorealistic credibility.
Start Rendering at Studio Level
The pipeline described in this article is not theoretical — it is the operational standard that separates studios charging premium rates from those competing on price for mid-tier visualization work. The materials knowledge, GI configuration, render pass architecture, and post-production protocol are all learnable. The investment is in time and iteration, not in proprietary secrets.
Your first step: audit your last 3 interior renders against the 6-phase workflow in this article. Identify which phase produced the most visible quality gap. For most practitioners, it will be Phase 2 (material definition) or Phase 6 (post-production). Fix those two phases before touching render settings or hardware.
Nuvira Space’s Visual Lab publishes technical visualization analysis regularly. Follow the series at nuviraspace.com to stay current with production-grade rendering standards as engines and hardware evolve.
© Nuvira Space All rights reserved. | VISUAL LAB Series | All specifications cited are based on V-Ray 7 for SketchUp technical documentation, Chaos Group product specifications (2026), D5 Render engine benchmarks, and Nuvira Space Visual Lab internal production testing on NVIDIA RTX 4080 hardware. The Seladon Loft is a speculative internal concept study and does not represent a completed project.