

Table of Contents
Architectural Photography Composition Is Not a Soft Skill
Flip through any major architecture magazine from 2018 and count the clichés: the fisheye corridor, the symmetry-for-symmetry’s-sake atrium, the golden hour smear on a curtain wall. These images are technically competent. They are compositionally dead. Architectural photography composition, when executed without analytical intent, becomes decorative noise — tolerated because buildings are inherently photogenic, not because the photographer understood what they were looking at.
The global shift toward real-time rendering, generative massing, and parametric skin systems has made this problem acute. Architects now produce near-photographic visualizations weeks before a foundation is poured. That visual pipeline has raised the baseline expectation for every image connected to a building — rendered or captured. If your camera work cannot match the intentionality of a high-fidelity Unreal Engine flythrough, you are losing the editorial argument before it starts.
This guide does not celebrate the camera. It dissects the frame. Each of the 7 techniques below targets a specific failure mode in conventional architectural photography workflow — and maps that failure to a corrective that is grounded in spatial logic, light physics, and material science.
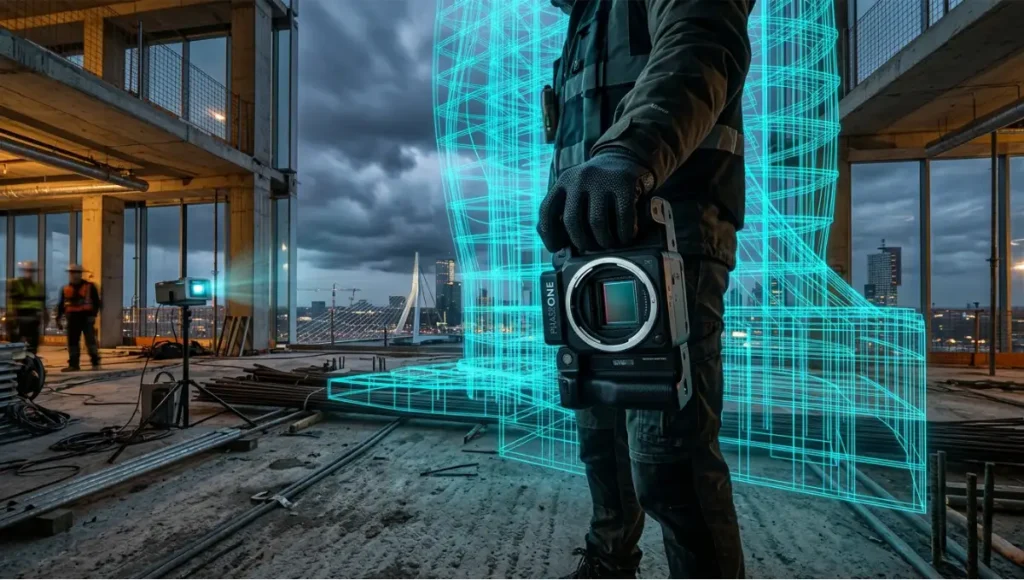
Nuvira Perspective: Where Human Vision Meets Machine Precision
At Nuvira Space, we operate at the intersection of real-time engine technology and built-environment storytelling. Our visualization pipeline routes every project through a synthesis layer — a deliberate handshake between the architect’s spatial intent, the renderer’s physically-based light model, and the photographer’s compositional judgment. The result is not a render that looks like a photo, or a photo that mimics a render. It is a unified visual language: precise, evidence-based, and scalable across media formats — a principle we extend fully into our VR architectural walkthroughoutputs and immersive client deliverables.
The seven compositional techniques outlined in this guide were stress-tested against our internal Unreal Engine 5 and Chaos V-Ray render outputs. When a composition principle holds across both a real-time ray-traced frame and a DSLR capture, it is structural — not stylistic. That is the only standard we apply here.
This is not a beginner’s guide in the diminutive sense. It is a beginner’s guide in the precise sense: it begins where most practitioners stop pretending they know what they are doing and starts asking the structural questions.
Step-by-Step Workflow: 7 Architectural Photography Techniques
Technique 1: Vanishing-Point Precision Over Rule-of-Thirds Habit

The Rule of Thirds is the first thing photography courses teach and the first thing architects should deprioritize. Architecture has geometry. Geometry has logic. That logic creates vanishing points — and those vanishing points are your primary compositional anchor, not a grid overlay.
In a single-point perspective setup, your lens axis must align with the building’s primary orthogonal. Deviation of more than 2–3 degrees creates perceptible keystoning that no post-production correction fully resolves without sacrificing corner resolution.
Technical Specifications
- Camera height: Set at 1.5–1.7m for a human-eye read; lower for exaggerated monumentality
- Lens axis alignment: Within ±2° of horizontal plane to suppress barrel keystoning
- Recommended focal length: 24mm–35mm full-frame for exterior context; 50mm for interior compression
- Tilt-shift lens: PC-E 24mm f/3.5D ED for zero-keystoning vertical correction in-camera
- V-Ray equivalent: Camera clipping > use VRayCam with film gate set to match physical lens data
Technique 2: Exposure-Bracketing for HDR-Ready Post-Production
A single-exposure architectural photograph is a liability. Exterior scenes routinely span 14–18 stops of dynamic range — a window to a bright courtyard against a shadow-deep corridor will clip at either end if you expose for the middle. Bracket to 5 or 7 exposures at 1-stop intervals and merge in Lightroom’s HDR function or Photomatix Pro with deghosting enabled.
This approach directly mirrors the multi-pass rendering workflow in Chaos V-Ray: beauty pass, diffuse pass, specular pass, and GI pass are composited in post rather than baked into a single output. The logic is identical. Capture data first; interpret it in post.
Technical Specifications
- Bracket range: 5 frames at -2EV, -1EV, 0EV, +1EV, +2EV
- ISO: 100–200 base ISO; avoid ISO 800+ to suppress luminance noise in shadow merge
- Shutter speed: Use Av mode with 2-second self-timer or cable release for mirror-up shooting
- Post-merge software: Adobe Lightroom HDR Merge or Photomatix Pro 7.x with align & deghost
- V-Ray correlation: Max Subdivs 24–32 in DMC sampler to reduce fireflies before single-frame extraction
Technique 3: Material-Aware Focal Plane Selection
Every material in a building performs differently under a lens. Polished concrete reads best under diffuse overcast light with a flat focal plane at f/8. Textured brick rewards raking sidelight and a deep depth-of-field to show relief. Perforated metal panels require careful backlight positioning to avoid moiré when shot with full-frame sensors above 36MP.
Material-aware composition means choosing your focal plane and aperture based on what the cladding system physically does to light — not based on what looks good in the viewfinder at capture. Confirm the material texture read at 100% crop before committing to the setup.
Technical Specifications
- Concrete / stone: f/8–f/11, diffuse light, front focal plane at primary surface
- Glass curtain wall: f/5.6–f/8, shoot at 15–45° angle to suppress full-sky reflection
- Perforated metal: f/11 minimum; shoot at ≥1.5m distance; avoid 36MP+ sensors without AA filter
- Timber cladding: Raking sidelight at 20–30° to surface; warm color temperature 4500–5000K
- UE5 equivalent: Nanite micro-polygon displacement + Lumen GI for material-accurate subsurface read
Technique 4: Human Scale as a Compositional Variable — Not an Afterthought
Including a human figure in an architectural photograph is not a gesture toward lifestyle marketing. It is a scale calibration device. A 6m atrium reads as intimate without a figure. With a properly positioned figure at 1/6 of the frame height, it reads as monumental. That is not a soft consideration — it is a spatial argument.
Position your subject at the golden-section intersection of the frame (not at the rule-of-thirds grid point) and ensure their movement vector leads inward to the architecture, not outward to the frame edge. Motion blur at 1/30s–1/15s communicates kinetic inhabitation without competing with structural geometry.
Technical Specifications
- Figure-to-frame height ratio: 1:5 to 1:7 for exterior scale; 1:3 to 1:4 for interior intimacy
- Shutter speed for motion blur: 1/15s–1/30s for pedestrian blur at street level
- Figure placement: Golden section intersection: 61.8% from left or right edge, 38.2% from top or bottom
- Clothing: Neutral mid-tones preferred; avoid red or yellow which dominate warm architectural palettes
- V-Ray correlation: Chaos Scatter for distributed population simulation at architectural scale
Technique 5: Leading Lines as Structural Narrative
Every building produces at least three categories of leading lines: structural (column grids, beam soffits), material (coursing joints, panel seams), and light (shadow edges, reflected light paths). Architectural photography composition that ignores the third category produces images that are technically correct and spatially inert.
Map all three line categories before you set up the tripod. Identify where they converge in the frame and ask whether that convergence point is the actual subject of your photograph. If not, reposition until it is. Shadow-edge lines move at approximately 0.25° per minute during golden hour — build that into your shot timing.
Technical Specifications
- Shadow edge movement: ~0.25°/min during golden hour at mid-latitudes (30°–50°N)
- Minimum lines for strong composition: Two of the three categories intersecting within the frame
- Post-processing: Luminosity mask to isolate and intensify shadow-edge contrast without affecting midtones
- UE5 equivalent: Lumen hardware ray-tracing + Sky Atmosphere component for physically-accurate shadow angle simulation (see also our comparative breakdown: Lumion vs Enscape vs D5 Render)
Technique 6: Global Illumination Logic Transferred to Camera White Balance
The single most underutilized tool in architectural photography is the custom white balance preset — not because photographers do not know it exists, but because they do not think in GI terms when they are behind the camera. Global illumination in a physically-based renderer accounts for indirect light bounced from floor, ceiling, and wall surfaces. That bounced light has a color temperature specific to each surface’s albedo.
In a timber-lined Scandinavian interior, the indirect light from floor bounce will push toward 4200–4400K. Set your white balance to 5600K (nominal daylight) and that warmth reads as an error. Set it to 4300K and it reads as architectural intention. The same logic governs exterior facades in urban canyons, where reflected sky light from surrounding glass towers creates a secondary blue cast at 7000–8000K on the shadow face.
Technical Specifications
- Exterior — open sky: 5500–6000K; reduce 300–400K for north-facing facades
- Interior — timber dominant: 4000–4400K to honor bounce warm cast
- Interior — concrete dominant: 4800–5200K; add -5 to -10 green shift in Lightroom to correct sodium bounce
- Urban canyon — shadow face: Shoot raw; correct to 6200–7000K in post to neutralize sky reflection cast
- V-Ray equivalent: VRayDomeLight + HDRI with color temperature physically matched to shoot conditions
Technique 7: Negative Space as Active Geometry
The unphotographed sky is not empty. It is a compositional surface with pressure, weight, and color gradient. Every roof line, parapet edge, and canopy termination produces a silhouette boundary — and that boundary is only as strong as the negative space it is pressed against. Treat the sky zone of your frame as a designed element, not a background.
In high-contrast backlit conditions, expose for the sky at -1EV relative to the facade and recover shadow detail in post. This deliberately compresses the facade read into silhouette and forces the negative space to carry compositional weight. When executed with a building that has a complex roofline — perforated screens, parametric fins, stepped parapets — the result reads as graphic architecture, not photography.
Technical Specifications
- Sky exposure offset: -0.7EV to -1.3EV relative to facade metering for silhouette effect
- Preferred sky conditions: Graduated overcast at golden hour; avoid uniform white overcast (no tonal gradient)
- Post-processing: HSL panel: reduce sky luminance to 20–30; increase sky saturation to 60–70
- Focal length: 35mm–50mm to preserve sky proportion; wider lenses distort sky-to-building ratio
- UE5 equivalent: Sky Atmosphere + Volumetric Clouds with sun disk enabled for photorealistic sky read
Comparative Analysis: Nuvira Workflow vs. Industry Standard
Where the Workflow Gap Lives
The architectural photography industry’s dominant workflow has not changed structurally since the shift to digital capture in the early 2000s: site visit, tripod, bracket, Lightroom, deliver. That pipeline produces consistent, acceptable results. It does not produce compositionally intelligent results — because the interpretation layer (what should this image argue?) is never formalized.
Nuvira’s integrated visualization workflow inverts the sequence: we build the compositional argument in the real-time engine first, then validate it on-site. Camera settings are derived from render data, not guessed at on location.
| Criterion | Industry Standard | Nuvira Integrated Workflow |
|---|---|---|
| Composition planning | On-location trial and error | Pre-visualized in UE5 before site visit |
| White balance | Auto or nominal preset on shoot day | Derived from V-Ray GI bounce color analysis |
| Exposure strategy | Bracket and hope | HDR mapped to render dynamic range data |
| Human scale | Added as lifestyle afterthought | Positioned using golden-section spatial logic |
| Shadow timing | Golden hour intuition | Shadow-angle simulation via Sky Atmosphere |
| Post-production | Lightroom global adjustments | Luminosity masks + multi-pass blend correlated to render passes |
| Output format | JPEG/TIFF for print | 16-bit EXR-correlated TIFF for media-agnostic use |
Speculative / Internal Concept Study: Project STRAND by Nuvira Space
Project Overview — Location / Typology / Vision
Project STRAND is a speculative mixed-use tower study sited in Rotterdam’s Lloydkwartier district — a post-industrial harbor zone currently undergoing its third wave of adaptive redevelopment. Rotterdam’s urban context provides a specific photographic challenge: the harbor light is polarized, variable, and frequently overcast, producing flat illumination that destroys conventional golden-hour compositional strategy.
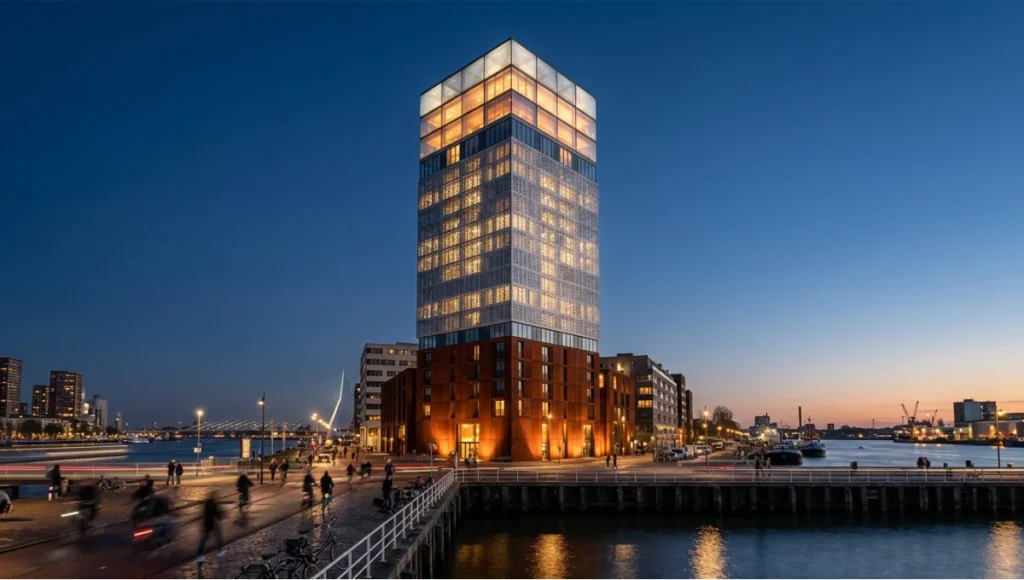
The typology is a 22-story residential-over-retail tower with a weathering-steel base, perforated aluminum mid-section, and a glass-and-ETFE crown. Each material tier demands a distinct compositional and lighting approach. The vision: a single photographic campaign that reads as architecturally coherent across three radically different surface conditions.
Design Levers Applied
Macro Composition Strategy
- Primary camera position: Lloydkade waterfront, 80m south of the tower base — 1-point perspective aligned to tower’s structural grid
- Focal length selection: 85mm f/2.8 for crown read (compresses sky proportion); 35mm f/8 for full-tower-in-context
- Human scale deployment: Cyclists and pedestrians in foreground at 1:6 frame-height ratio, motion-blurred at 1/20s
Material-Zone Lighting Protocol
- Weathering steel base: Shot under uniform overcast (diffuse light eliminates specular glare on oxide surface); white balance 5800K
- Perforated aluminum mid-section: Shot in backlit conditions, sun at 160° azimuth to create diffraction glow through perforation pattern
- ETFE crown: Twilight capture at -15 min before sunrise; interior lighting activated for transmitted warm cast against blue sky
GI-to-Camera Color Calibration
- Harbor water bounce: Sky reflection at 6800K cast on north facade — corrected to 6500K in post with -8 green shift
- Adjacent brick warehouse bounce: Adds 3600K warm cast to west facade shadow zone at late afternoon — white balance split at 4200K for shadow-zone recovery
Transferable Takeaway
Project STRAND demonstrates the central argument of this guide: compositional technique is not universal — it is material-specific, light-specific, and context-specific. Rotterdam’s diffuse harbor light forced every compositional decision to rely on geometry and negative space rather than chromatic drama. If your workflow depends on golden hour to make your images work, your compositions are not architectural — they are meteorological.
The Rotterdam site also validated the sky-as-active-geometry technique. The city’s flat topography and wide harbor basin produce skies with visible tonal gradients even under overcast conditions. Exposing at -1EV relative to the facade and recovering with targeted luminosity masking produced negative-space reads that matched the render outputs within two Lightroom adjustment steps.
Intellectual Honesty: Hardware Check
No compositional technique corrects a hardware limitation. Before investing time in the workflow above, audit your equipment stack against these minimum specifications for professional architectural photography output.
- Full-frame sensor, minimum 24MP: APS-C sensors introduce field-of-view crop factors that distort perspective planning when switching between focal lengths on-site
- Tilt-shift lens (24mm or 45mm): Keystone correction in post costs resolution. A PC-E or TS-E lens solves it optically. This is non-negotiable for interior corridor and atrium work
- Sturdy carbon-fibre tripod with geared head: Ball heads introduce micro-tilt drift during long exposures. A geared head locks axis independently — critical for tilt-shift setups
- Calibrated monitor, minimum DCI-P3 90%: Editing architectural images on an uncalibrated sRGB panel means your color decisions are wrong before you save the file
- 16-bit raw processing pipeline: 8-bit JPEG edits in Lightroom or Camera RAW produce banding in graduated sky transitions — a visual error that is immediately legible to any architect reviewing the output
If your current hardware does not meet these specs, the compositional techniques above will still improve your output. But they will not deliver professional-grade results until the hardware ceiling is removed.
2030: The Frame Will Know the Building
By 2030, the distinction between a rendered image and a photographed image will be operationally irrelevant in architectural media. AI-assisted camera systems will read BIM metadata from a building’s embedded NFC or QR identifiers and auto-propose compositional angles based on the designer’s stated spatial intent. Computational photography — already present in smartphone HDR processing — will be applied at full-frame DSLR resolution through on-sensor neural processing units.
The compositional techniques outlined in this guide will not become obsolete. They will become automated entry points — already foreshadowed by today’s generation of AI rendering plugins automating tone-mapping, material recognition, and compositional cropping at the render output stage. The human value-add will shift upstream to spatial curation: deciding which compositional argument a building deserves, not executing the mechanics of capturing it.
Nuvira Space is already positioning for this transition. Our integration of Unreal Engine 5 real-time rendering with Chaos V-Ray high-fidelity passes allows us to pre-validate compositional arguments at frame-accurate resolution before a camera is ever deployed on-site. By 2030, that pre-validation will become bidirectional: the site will feed data back to the render engine in real time, closing the loop between digital intent and physical capture.
The practitioners who will lead that transition are not the ones with the best cameras. They are the ones who understand why a specific vanishing point tells a specific spatial story — and can program that understanding into an automated pipeline without losing it.
Secret Techniques: Advanced Compositional Methods

The Focal-Stack for Ultra-Sharp Architectural Detail
Standard f/11–f/16 apertures produce sufficient depth-of-field for most architectural work, but diffraction softening at these apertures costs you sharpness at pixel level on high-megapixel bodies. The solution is focus stacking: capture 5–8 exposures with the focal plane shifted from foreground to background, then merge in Helicon Focus or Photoshop’s auto-blend layers. The result is a composite with f/5.6-level per-plane sharpness and f/16-level apparent depth-of-field.
- Helicon Focus settings: Method B (weighted average) for architectural subjects; Radius 4, Smoothing 2
- Number of focus steps: 5 for 24mm wide; 8–12 for 50mm and above
- Critical requirement: Zero subject movement between frames — night or overcast conditions only
The Luminosity Mask Sky Swap Without the Sky Swap
Sky replacement is a post-production shortcut that introduces color cast mismatches at the roofline boundary. Instead, use a luminosity mask to selectively reduce sky luminance and increase saturation in the capture, matching the rendered sky output without compositing a foreign sky into the frame. This technique preserves the original light relationship between building and sky.
- Software: Photoshop with Lumenzia or TK8 luminosity mask panel
- Target luminance zone: Zones 7–9 (near-white sky) isolated and adjusted independently
- Saturation increase: +30 to +45 on masked sky zone; maintain hue alignment with facade palette
The Off-Axis Flash Technique for Interior Material Accuracy
Interior architectural photography under mixed ambient light (fluorescent overhead + daylight window + tungsten accent) cannot be color-corrected by a single white balance setting — because three different color temperatures are simultaneously active in the same frame. The solution is a single off-camera flash unit with a CTO gel tuned to match the dominant ambient source, placed to fill the secondary shadow zone without creating visible direction. This reduces the effective color temperature spread in the frame from a 3000K range to an 800K range — post-correctable with a single global adjustment.
- Flash unit: Profoto B10 or equivalent with 1/4 CTO gel
- Flash power: -2EV relative to ambient metering to fill without overpowering
- Placement: Off-axis at 120–150° from lens axis; bounced from white ceiling for diffuse fill
Frequently Asked Questions
Q: Do I need a tilt-shift lens to produce professional architectural photography?
A: Not strictly — but the absence of a tilt-shift lens moves the keystone correction burden entirely into post-production, and post-production correction is always a resolution compromise. For publication-grade output at 36MP+, in-camera optical correction is the professional standard. The Canon TS-E 24mm f/3.5L II and Nikon PC-E 24mm f/3.5D ED are the two primary options. If budget prohibits, correct with Lightroom’s Transform > Guided Upright and plan for a 10–15% crop to the corrected frame.
Q: What is the relationship between V-Ray sun angle and on-site shoot timing?
A: V-Ray’s Sun & Sky system uses geographic coordinates and calendar date to simulate physically-accurate sun position. Before a site visit, set up the render camera at the planned capture position, set the V-Ray Sun to the geographic location of the project, and scrub the time of day in the render to identify the shadow angle that produces your target composition. Export the sun azimuth and altitude data — both numbers translate directly to local solar time, which you can confirm against a sun-tracking app (e.g., PhotoPills or Sun Surveyor) for the actual shoot day.
Q: Should I shoot RAW or RAW+JPEG for architectural work?
A: RAW only. The JPEG derivative is a compressed, 8-bit, camera-interpreted file with baked-in sharpening and tone curve decisions. Architecture photography routinely requires precise white balance correction, luminosity masking, and shadow recovery — all of which degrade irreversibly in JPEG. The only use case for architectural JPEG delivery is social media content where turnaround speed overrides quality. For any client deliverable or publication submission: 16-bit processed TIFF from RAW.
Q: How do I photograph a building with a reflective glass facade without capturing my own reflection?
A: Three-part solution. First, shoot at a ≥30° angle to the glass plane — this moves the specular reflection angle away from your lens axis. Second, use a circular polarizing filter (CPL) and rotate it to suppress the reflected sky image on the glass surface; this works most effectively at 35–50° incidence angles. Third, position yourself against a non-reflective dark background (shadow zone, matte wall) if shooting straight on is unavoidable.
- CPL effectiveness: Maximum at 35–50° incidence; negligible at 0° or 90°
- Filter factor: CPL costs approximately 1.5–2 stops of light — account for this in your exposure calculation
Q: How does the AIA approach architectural photography documentation standards?
The American Institute of Architects publishes practice guidelines on visual documentation as part of their Firm Survey and Practice Management resources. Their framework aligns with what this guide argues: photographic documentation is a professional act, not a marketing function. Architectural record photography should capture spatial sequence, material quality, and human occupancy — not just aesthetic moments. Review the AIA’s current practice resources at aia.org/practice and specifically their sections on project documentation and visual communication standards.
External reference: AIA Practice Resources
Q: What is the minimum viable computer specification for processing architectural photography at the Nuvira standard?
A: For Lightroom and Photoshop with luminosity mask plugins:
- CPU: Intel Core i9-13900K or AMD Ryzen 9 7950X (16-core minimum for focus-stack processing)
- RAM: 64GB DDR5 minimum; 128GB recommended for 50MP+ multi-layer composites
- GPU: NVIDIA RTX 4070 Ti or above (CUDA acceleration for Lightroom GPU processing and Photoshop neural filters)
- Storage: NVMe SSD at 3,500+ MB/s read speed for responsive 16-bit TIFF handling
- Display: Reference monitor with hardware calibration, DCI-P3 ≥95% — Dell UltraSharp U3224KB or Eizo ColorEdge
Elevate Your Visual Practice With Nuvira Space
The seven techniques in this guide represent a starting position, not a finish line. Each one connects to a deeper discipline — real-time rendering, physically-based material science, computational light simulation — that Nuvira Space works with on every project we take through production.
If your current architectural photography workflow is producing images that satisfy clients but do not challenge the way buildings are understood, it is time to introduce the analytical layer. That layer does not require new hardware first. It requires a different question: not ‘what does this building look like?’ but ‘what spatial argument does this image need to make?’
Nuvira Space produces technical guides, workflow documentation, and visualization case studies for architectural practitioners working at the intersection of digital and physical environments. The Visual Lab series publishes monthly — each issue targeting a specific failure mode in conventional architectural media practice.
Visit www.nuviraspace.com to access the full Visual Lab archive, submit a project for consideration, or engage our team for integrated visualization and photography workflow consultation.
© Nuvira Space. All rights reserved.  |  THE VISUAL LAB Series  |  All specifications cited are based on Chaos V-Ray 6.x documentation, Unreal Engine 5.3 release notes, Adobe Lightroom Classic 13.x technical reference, and Nuvira Space internal render pipeline benchmarks (2024–2025). Project STRAND is a speculative internal concept study and does not represent a completed project.