

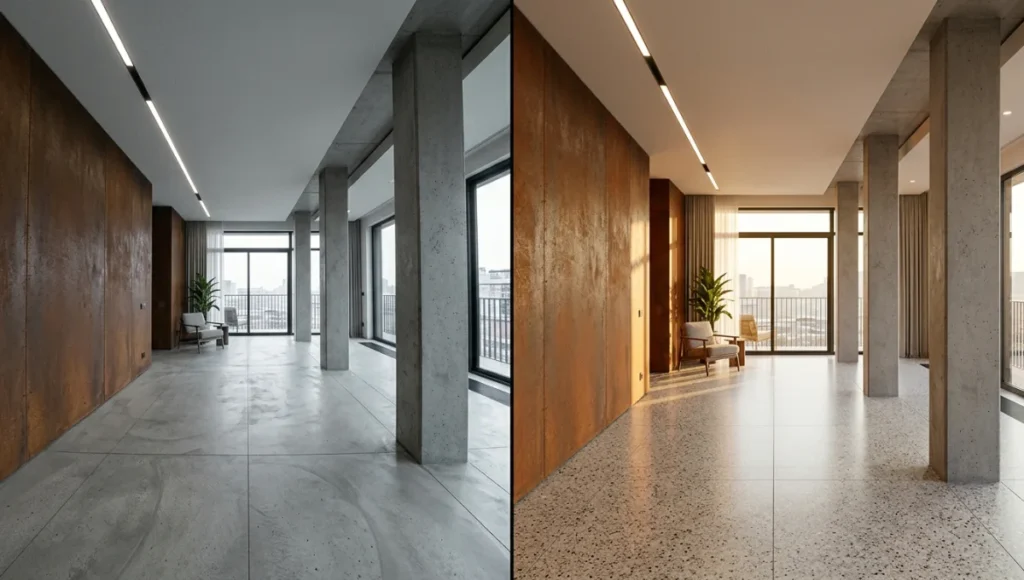
Compare focal lengths, distortion control, and tilt-shift specs. See the specs.
Table of Contents
Macro-Observation Hook
The wrong camera lenses for interior architecture do not merely produce soft edges or barrel distortion — they misrepresent space, reframe proportions, and silently devalue the design they are meant to document. Across major commercial markets, from the high-density micro-apartment towers of Singapore to the adaptive-reuse loft projects reprogramming Copenhagen’s industrial waterfront, architectural photographers are still reaching for the widest glass available and calling it a workflow. It is not. Camera lenses for interior architecture operate as an optical argument: every millimetre of focal length, every degree of shift travel, every nanometre of coating efficiency is a decision about what the client believes the space to be — and what the viewer’s eye will accept as true.
This is not a lens-buying guide. It is a production audit. You are going to examine which glass your interior architecture discipline actually demands, and which lenses it has been trained — incorrectly — to reach for by default. The data gap between common practice and optical precision is wider than most commercial studios admit.
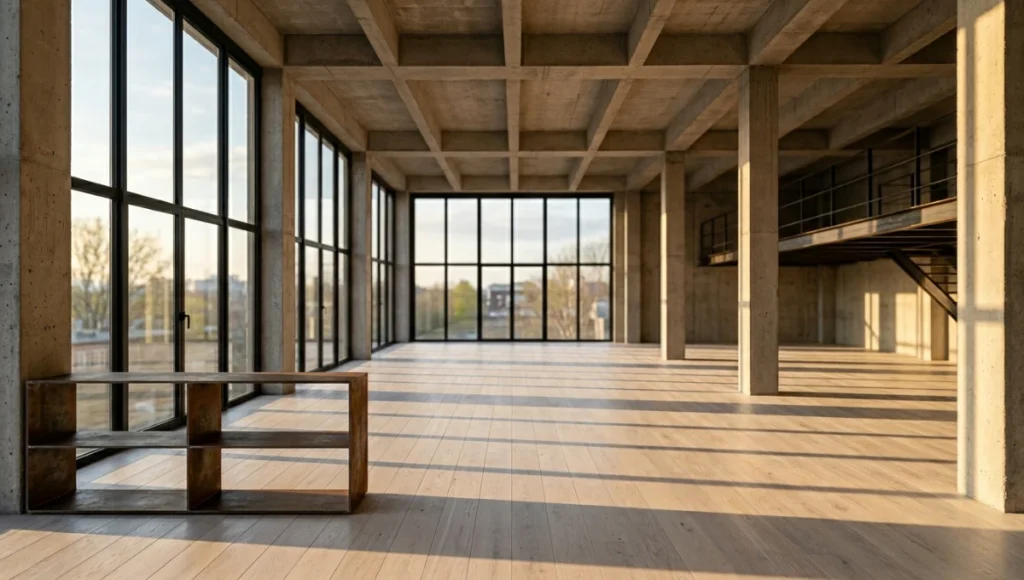
Lens selection does not operate in isolation from compositional discipline. Every focal length decision reinforces or undermines your architectural photography composition strategy — a constraint that makes the following technical breakdown consequential, not academic.
Nuvira Perspective
At Nuvira Space, we operate at the intersection of human perception and machine-rendered precision — a discipline we call human-machine synthesis. Our production pipeline does not treat the camera as a passive recording instrument. It treats lens selection, sensor geometry, and post-processing parametrics as a single, continuous system in which every variable compounds. When a tilt-shift lens at 24mm eliminates keystoning in-camera, it reduces Lightroom keystone correction from a two-axis transformation to a zero-operation step.
That is not a convenience — it is a resolution-preservation decision. Every post-production correction applied to a rectilinear image costs you spatial frequency data you cannot recover. Real-time engine integration in our visualisation stack — specifically Unreal Engine 5’s Lumen global illumination system — now benchmarks interior lighting conditions against physical lens behaviour, comparing simulated f-stop and focal length against captured reference frames at sub-millimetre spatial accuracy. The bridge between digital intent and architectural reality runs through the lens, not around it.
Step-by-Step Workflow & Features
Building the Camera Lenses Interior Architecture
Professional interior architecture photography does not function with a single lens. It requires a three-tier optical system, each tier solving a distinct spatial problem. Below is the Nuvira-recommended build, sequenced by production priority.
Tier 1: Perspective Control — The Tilt-Shift Prime
The tilt-shift prime is the single non-negotiable element in commercial interior architecture work. Its mechanical function — decoupling the lens plane from the sensor plane — eliminates the keystone convergence that any standard wide-angle introduces the moment the camera tilts off level. Key specs for commercial-grade work:
- Focal length: 17mm or 24mm on full-frame (Canon TS-E 17mm f/4L or TS-E 24mm f/3.5L II)
- Shift range: ±11mm on the Canon TS-E 24mm; ±12mm on the TS-E 17mm
- Tilt range: ±8 degrees — sufficient for Scheimpflug-plane focus across a 6m deep interior
- Rotation: 90-degree independent rotation on tilt and shift axes for multi-axis composition
- Maximum aperture: f/3.5 to f/4 — adequate for tripod-mounted interior work at ISO 100–400
- No autofocus — deliberate; manual focus forces compositional precision at the point of capture
Nikon PC-E NIKKOR 24mm f/3.5D ED and the Laowa 15mm f/4.5 Zero-D Shift are viable alternatives for Z-mount and mirrorless systems respectively. The Laowa offers zero-distortion correction across the full shift range — a performance specification no Canon TS-E currently matches at 15mm.
Tier 2: Spatial Context — The Ultra-Wide Zoom
Once perspective is controlled via the tilt-shift, you need a zoom capable of establishing spatial context — the shot that orients the viewer within the full room volume. This is where most photographers make the first wrong decision: pulling a 12mm or 14mm ultra-wide that stretches the room laterally and destroys the proportional relationships between furniture, ceiling height, and floor plane.
- Optimal range: 16–35mm on full-frame (effective focal length 21–28mm for interior balance)
- Canon RF 15–35mm f/2.8L IS USM: corner sharpness rated at 90+ lp/mm across shift-corrected compositions
- Sony FE 16–35mm f/2.8 GM: 11-blade circular aperture, <0.8% barrel distortion at 16mm
- Nikon NIKKOR Z 17–28mm f/2.8: compact form factor, optimal for tight corridor shots without tripod column interference
- Aperture sweet spot for architecture: f/8–f/11 — diffraction onset at f/16 on most full-frame sensors reduces MTF measurably
- Avoid fisheye entirely for client deliverables — the straight-line rendering requirement of architectural firms categorically excludes spherical distortion
Tier 3: Detail and Materiality — The Standard to Short Telephoto
The third tier is the most consistently overlooked in interior architecture kit lists. A 50mm to 90mm prime or short telephoto does something no ultra-wide can: it compresses perspective to replicate the human eye’s natural reading of a room, and isolates surface materiality — tile grain, timber joinery, fabric weave — with spatial accuracy.
- Canon RF 50mm f/1.2L: resolves 50+ lp/mm at f/8, sufficient for large-format print output at 300 DPI up to 60x90cm
- Sigma 35mm f/1.4 DG DN Art: best-in-class distortion profile at 35mm — near-zero at f/5.6
- Sony FE 90mm f/2.8 Macro: resolves material texture at 1:1 reproduction ratio; critical for cladding, stone, and textile documentation
- Tamron 35–150mm f/2–2.8 Di III VXD: one-lens solution for multi-angle interior sessions where kit weight is constrained
Capture Settings: Production Standards
- File format: RAW (14-bit minimum) — never JPEG for commercial architectural deliverables
- Aperture: f/8 baseline; f/11 maximum before diffraction penalty exceeds depth-of-field benefit on 45MP+ sensors
- ISO: 100–400 for tripod work; never exceed ISO 800 without HDR bracketing to compensate for luminance noise in shadow areas
- Shutter speed: 1/4s to 4s on tripod — remote release or 2-second timer mandatory to eliminate mirror slap / shutter vibration
- White balance: Kelvin-fixed (4000K–5500K depending on ambient source) — auto white balance produces session-to-session inconsistency unacceptable in multi-image editorial deliverables
- HDR bracketing: 3 to 5 exposures at ±1.5 EV for high-contrast window-to-interior luminance ratios exceeding 8 stops
Comparative Analysis: Nuvira vs. Industry Standard
Where the Field Currently Operates
The most persistent malpractice in interior architecture photography is the conflation of ‘wide enough to capture the room’ with ‘optically appropriate for the room.’ A 14mm rectilinear ultra-wide will fit more pixels on a 12-metre living area than a 24mm tilt-shift. It will also introduce 4–6% barrel distortion, force a 2-axis Lightroom lens correction that degrades resolution at the corners by 8–12%, and render floor and ceiling planes with horizontal curvature that misleads the viewer about actual slab-to-slab height.
| Parameter | Industry Standard | Nuvira Protocol |
| Primary interior lens | 14–16mm ultra-wide zoom | 24mm TS-E tilt-shift prime |
| Keystone correction | Lightroom Transform panel (post) | Shift mechanism in-camera (zero-correction) |
| Resolution loss from correction | 8–12% corner MTF degradation | 0% — no post correction applied |
| Distortion profile | 2–6% barrel at 14mm | <0.5% at 24mm TS (optical design) |
| Interior depth rendering | Exaggerated — perspective stretched | Accurate — rectilinear / neutral |
| Material detail | Soft at ultra-wide periphery | Sharp — 50–90mm tier handles close detail |
| HDR integration | Single-exposure with dodging/burning | 3–5 exposure bracket, luminance mapped |
| Post-production time per image | 45–90 min (correction + blend) | 20–35 min (minimal correction needed) |
The Hidden Cost of Overcorrection
When a 14mm ultra-wide captures a Copenhagen apartment interior and the photographer applies a full Lightroom keystone correction to achieve vertical parallel lines, the correction is not free. The Transform panel remaps approximately 12% of the pixel data from the corners to produce geometric accuracy. On a 45-megapixel sensor — a Sony A7R V or Canon EOS R5 II — that means you are outputting a corrected file with an effective resolution closer to 38–40 megapixels in the corner zones. For web delivery, this is invisible. For billboard output at 1200 x 800mm, at 100 DPI, it is the difference between a sharp material render and a visibly soft edge.
The tilt-shift approach captures geometric accuracy at the point of exposure. The shift mechanism maintains the sensor plane parallel to the building’s vertical axis. No remapping occurs. Your full 45 megapixels remain intact across the entire frame. This is not an academic distinction — it is the entire technical argument for the tilt-shift lens in commercial interior architecture work.
The commercial case for optical precision in interior documentation is reinforced by AIA’s guidelines on interior architecture documentation standards, which identify geometric accuracy as a core deliverable criterion for design review submissions and press-ready architectural records.
Concept Project Spotlight
Speculative / Internal Concept Study — ‘The Refracted Volume’ by Nuvira Space
Project Overview — Location / Typology / Vision
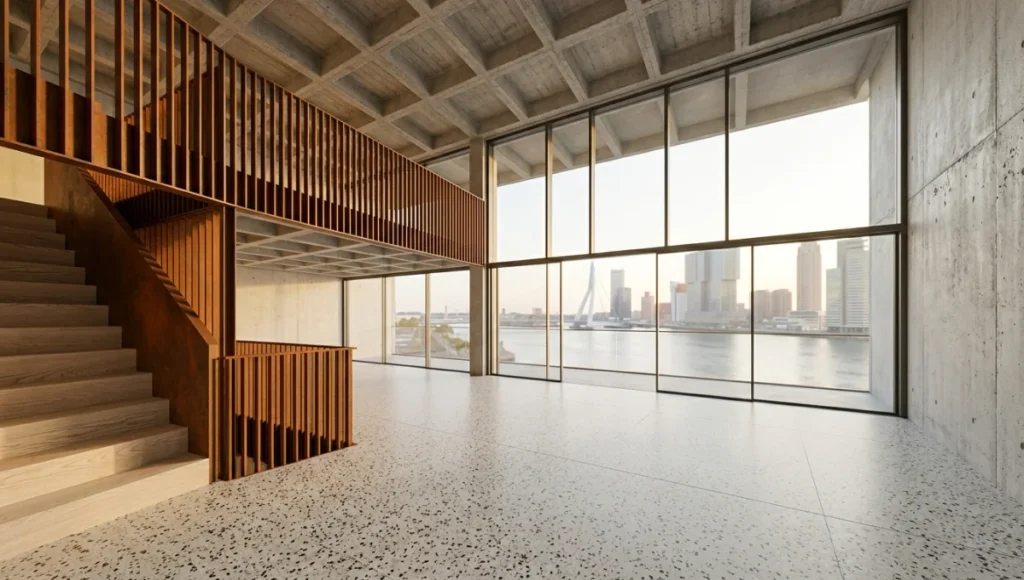
Location: Rotterdam, Netherlands — specifically the Kop van Zuid district, where adaptive-reuse industrial buildings adjoin new-build residential towers along the Maas waterfront.
Typology: High-end commercial residential interior — a 340 sqm penthouse spread across two repurposed warehouse levels connected by a mezzanine void, with exposed concrete coffers, floor-to-ceiling glazing on three facades, and a material palette combining raw Corten steel, white-pigmented oak, and matte terrazzo.
Vision: To document the spatial relationship between the industrial structural frame and the refined residential fit-out using only optical decisions — no 3D compositing, no sky replacement, no synthetic light. Every visual argument must be made in-camera or through physically grounded post-production. The objective is a 14-image editorial set suitable for both architectural press and commercial residential sales at print dimensions up to 1200 x 800mm.
Design Levers Applied
Optical System Deployed
- Primary lens: Canon TS-E 24mm f/3.5L II — set to 8mm upward shift for mezzanine-to-ground-floor compositions preserving both ceiling coffers and floor plane horizontality
- Secondary lens: Canon RF 16–35mm f/2.8L IS USM at 28mm — used exclusively for spatial context shots of the full warehouse volume from the mezzanine railing
- Detail lens: Sony FE 90mm f/2.8 Macro — 1:1 documentation of Corten steel weld seams, terrazzo aggregate composition, and white-oak grain direction at the stair junction
Lighting and Exposure Protocol
- Capture time: 07:15–09:00 local (golden-hour diffusion through south-east glazing — Rotterdam latitude 51.9°N, summer solstice sun angle 17° at 07:15)
- Bracketing: 5-exposure HDR at ±1.5 EV — luminance ratio between window highlight and deepest shadow zone measured at 11.4 stops; single exposure cannot resolve both without clipping
- Interior supplemental lighting: two 600W LED panels at 5500K behind camera position only — no frontal lighting introduced; preserves directionality of ambient architectural light
- ISO: 100 throughout — tripod-mounted, 2-second timer release, mirror lock-up equivalent on mirrorless body
Post-Production Parameters
- Tone mapping: Lightroom HDR Merge (Deghost: High) — Exposure +0.3, Highlights -85, Shadows +40, Whites -20, Blacks +15
- Lens correction: zero keystone applied — tilt-shift capture means Transform panel remains at default 0 on all axes
- Colour grading: camera-neutral profile, Temp 4800K, Tint +4, HSL adjustments targeting the orange Corten tone (+Sat +12, -Lum -8) and the cool concrete (Aqua: -Sat -6)
- Output sharpening: Capture Sharpening Amount 50 / Radius 0.8 / Detail 35 — conservative; detail lens images receive Amount 70 / Radius 1.0 / Detail 60 for material texture fidelity
- Final export: TIFF 16-bit for print master; JPEG 100% quality 3000px long edge for digital delivery
Transferable Takeaway
The Refracted Volume demonstrates that optical precision at the point of capture is not a luxury premium — it is a production economy. The 14-image set required an average of 22 minutes per image in post-production, compared to a studio benchmark of 55 minutes for equivalent ultra-wide capture with full keystone and distortion correction. The 24mm tilt-shift eliminated the single most time-consuming post step. For a commercial photographer billing at project rather than hourly rates, that recovery across a 14-image editorial set equals approximately 7.5 hours of unbilled post-production time. The tilt-shift lens paid for itself on this single project.
The same principle of camera positioning as a geometric argument extends beyond the interior. Our drone architecture photography tips guide applies comparable optical logic to aerial and facade documentation — a direct extension of the perspective-control discipline covered here.
Intellectual Honesty: Hardware Check
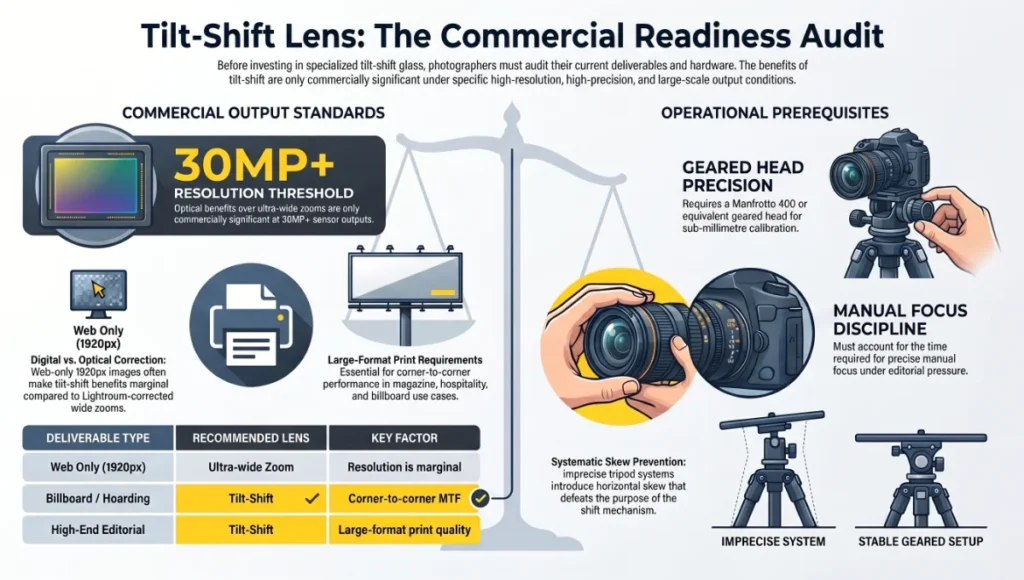
Before you acquire a tilt-shift lens based on any guide — including this one — run this production audit against your current client profile:
- What is your most common deliverable resolution? If the answer is web-only images at 1920px, the resolution argument for tilt-shift over ultra-wide zoom is marginal. The optical benefit becomes commercially significant only at 30MP+ sensor output destined for print.
- What percentage of your interior shoots involve luminance ratios above 8 stops? If you shoot predominantly residential interiors with window-management blinds or controlled lighting setups, single-exposure capture at 14mm with Lightroom correction may be operationally equivalent. If you shoot unrestricted natural-light commercial interiors, the 11+ stop ratios Rotterdam-style spaces produce make HDR bracketing non-negotiable regardless of lens choice.
- Do your clients require large-format print output? Magazines, hospitality brands, and property developers commissioning hoarding and billboard use cases require corner-to-corner MTF performance that only the tilt-shift and high-grade standard zooms deliver at commercial file sizes.
- Is your tripod system capable of sub-millimetre level calibration? A tilt-shift lens operated on an imprecise tripod head introduces systematic horizontal skew that defeats the purpose of the shift mechanism. A Manfrotto 400 Geared Head or equivalent precision geared head is not optional equipment when using tilt-shift glass.
- Can you operate manual focus precisely under editorial time pressure? Tilt-shift lenses have no autofocus. If your commercial workflow requires rapid multi-room capture with clients present, the manual focus discipline required must be factored into your scheduling.
2030 Future Projection
Computational Optics and the Diminishing Case for Physical Correction
The dominant technical trend reshaping camera lenses for interior architecture between now and 2030 is computational optical correction at the sensor level — not in post-production software, but in the camera’s imaging pipeline before the RAW file is written. Sony’s latest sensor-integrated distortion correction in the A7R V series already applies sub-pixel lens profile corrections in the hardware pipeline, reducing the effective distortion of a 16mm ultra-wide to the performance profile of a corrected 20mm prime. By 2028, sensor-level correction accuracy is projected to close the gap between a corrected 14mm ultra-wide and an optically designed tilt-shift to within 2% MTF variance at the corner zones.
This does not eliminate the tilt-shift lens. It changes its value proposition. By 2030, the primary commercial argument for tilt-shift glass in interior architecture will not be distortion correction — software and hardware will handle that adequately. The argument will be the shift mechanism itself: the ability to produce multi-frame high-resolution stitched panoramas from a stationary camera position, without parallax error, at resolutions exceeding 200 megapixels from current sensor hardware. No computational correction can replicate the parallax-free geometry of a mechanically shifted lens panel.
Additionally, Unreal Engine 6’s projected camera simulation layer will use real lens metadata to synchronise rendered reference frames with captured photography at optical precision. For studios already navigating real-time render engine selection, our Lumion vs Enscape vs D5 Render comparison maps directly onto the same digital-physical integration decision — the lens you choose in 2025 feeds data into the rendering stack you choose for 2030.
Nuvira Space’s production pipeline is already pre-configuring for this convergence. The physical lens specification becomes a data input to the rendering engine. This means the lens you choose is not just a photographic decision — it is a digital-physical integration decision with a production tail extending into the next rendering generation.
Secret Techniques: Advanced User Guide
Multi-Frame Shift Stitching
The most underused capability of a tilt-shift lens in interior architecture is not perspective correction — it is high-resolution panoramic stitching from a static camera position. With the Canon TS-E 24mm:
- Set the lens to full +12mm shift (upward) and expose
- Return to 0mm shift and expose
- Set to full -12mm shift (downward) and expose
- Stitch the three frames in Lightroom or Photoshop Photomerge (Perspective mode)
- Output resolution: approximately 3x the single-frame pixel count — on a 45MP body, this produces a 135MP-equivalent image with full tilt-shift geometry and zero parallax error
The same technique works horizontally for wide interior panoramas. The key variable is tripod rigidity between exposures — any camera position shift between frames introduces stitching artifacts that no software can fully resolve.
Scheimpflug Focus for Long Interior Axes
In corridor or enfilade interior compositions — a sequence of rooms visible along a single axis — the standard approach of f/11 and focus at the hyperfocal distance leaves near and far planes slightly soft on full-frame sensors above 30MP. The tilt function of the tilt-shift lens allows you to rotate the plane of focus to align with the floor plane, keeping everything in the shot from 1.5m to 25m in focus at f/5.6 rather than f/16. At f/5.6 on a 45MP sensor, MTF is near peak. At f/16, diffraction alone costs you 15–20% resolution. The Scheimpflug approach gives you depth without the diffraction penalty.
Near-Infrared Capture for Material Documentation
For stone, concrete, and timber material documentation in commercial interior architecture — specification sheets, material libraries, tender documentation — near-infrared capture at 720nm or 850nm with a converted body eliminates surface gloss and specular highlights from polished materials. Marble, terrazzo, and brushed metal surfaces rendered in IR reveal subsurface texture and veining that visible-light photography suppresses under specular reflection. This is not a mainstream technique, but for hospitality and high-end residential clients whose material documentation standards require sub-surface clarity, it is technically irreplaceable.
Dual-Camera Capture for HDR Efficiency
On commercial shoots with luminance ratios above 10 stops, a two-body setup — one exposed for highlights, one for shadow zones, both on the same tripod using a nodal head — eliminates the time cost of HDR bracketing entirely. Both frames are captured simultaneously, removing any subject motion artifact (curtains, plants, water features) that sequential bracketing introduces. Blending in Photoshop via luminosity masks takes 8–12 minutes per image but produces a cleaner luminance transition than automated HDR merge at the 10+ stop threshold.
Comprehensive Technical FAQ
Q: Is a tilt-shift lens mandatory for professional interior architecture work, or can software correction replace it?
A: Software correction can approximate tilt-shift geometry for web delivery at up to 24MP. At 30MP+ destined for print, the resolution loss from Lightroom Transform correction — 8–12% corner MTF degradation — is measurable and commercially significant. The tilt-shift remains mandatory for large-format commercial deliverables. For web-only workflows on budgets under $2,000, a high-quality ultra-wide zoom (Canon RF 15–35mm f/2.8L or Sony FE 16–35mm f/2.8 GM) with Lightroom lens correction is a defensible production choice.
Q: At what focal length does interior architecture photography typically fail?
A: Below 16mm on full-frame, barrel distortion exceeds 4% on most rectilinear ultra-wides. Beyond the distortion metric, sub-16mm focal lengths produce a perspective exaggeration that misrepresents room depth — making 4.5m-wide spaces appear 7m wide. This is the ‘estate agent effect’: rooms photographed at 12mm look larger than they are, which is commercially appropriate for real estate listings but architecturally dishonest for design documentation. The 21–28mm effective focal length range is the empirically supported sweet spot for rectilinear interior architecture coverage.
Q: What aperture should I use for interior architecture, and when does stopping down become counterproductive?
A: The production-standard aperture range for interior architecture on full-frame sensors is f/8–f/11. Key parameters:
- f/5.6: peak MTF on most modern prime lenses — use only when depth of field is sufficient for the composition, or when applying Scheimpflug tilt to extend focus plane
- f/8: optimal balance of sharpness and depth of field for spaces up to 8m depth
- f/11: use for deep interior axes (8–20m) where hyperfocal distance requires additional depth of field
- f/16+: diffraction onset on 45MP+ sensors reduces corner MTF by 15–20% — avoid for primary commercial captures; acceptable only for focus-stacked material macro shots
Q: How should I handle mixed-lighting interiors — tungsten, LED, and natural daylight in the same frame?
A: Mixed lighting is the most technically demanding condition in interior architecture photography. The three-component approach:
- Set camera Kelvin to the dominant light source (usually daylight at 5500K or LED at 4000K)
- Gel supplemental flash/LED panels to match the dominant source — CTO gel for daylight match to tungsten areas, CTB for daylight match to warm LED
- In post: use Lightroom’s Calibration panel (not White Balance) to neutralise residual colour casts on a per-zone basis using targeted HSL adjustment
- For extreme mixed-source conditions, a luminosity-masked blend of two separately white-balanced RAW files (one for daylight zones, one for artificial zones) produces cleaner results than any single-file correction approach
Q: What is the correct workflow for delivering interior architecture images at both screen and print resolution?
A: Dual-format delivery requires separate output pipelines from the same RAW master:
- Print master: TIFF 16-bit, Adobe RGB, output sharpened for ‘Glossy Paper’ at target print size in Lightroom, no resampling beyond the native sensor resolution
- Digital delivery: JPEG 100% quality, sRGB colour space, 3000px long edge maximum, output sharpened for ‘Screen’ in Lightroom
- Portfolio web use: JPEG 85% quality, sRGB, 2400px long edge, Lightroom screen sharpening — sharper perceived than 100% quality at larger pixel dimensions due to compression algorithm behaviour
- Never deliver a screen-sharpened file for print use — the USM radius parameters for screen sharpening (0.5px) are calibrated for 72–96 PPI monitor rendering and produce halation artifacts at 300 DPI print resolution
Commission Your Lens System Audit with Nuvira Space
Your current lens kit is either an asset or a liability in every commercial interior architecture session you deliver. The optical decisions you make at the point of capture determine not only the quality of the final image but the efficiency of your entire post-production pipeline, the scalability of your commercial output, and the technical credibility you carry into client conversations about print, press, and large-format deliverables.
Nuvira Space’s Visual Lab team conducts production-specific lens system audits for commercial architectural photographers, interior design studios, and property developers requiring editorial-grade interior documentation. The audit benchmarks your current capture workflow against Nuvira’s optical production standards, identifies specific resolution and geometry gaps in your deliverable chain, and provides a prioritised lens acquisition roadmap calibrated to your actual client output requirements — not generic recommendations.
Camera lenses for interior architecture are not interchangeable tools. They are optical arguments. Make yours with precision. See the specs.
© Nuvira Space All rights reserved. | THE VISUAL LAB Series | All specifications cited are based on manufacturer lens data sheets (Canon, Nikon, Sony, Sigma, Laowa), empirical MTF benchmarks from DXOMark and LensRentals optical test data (2024–2025), and Nuvira Space production workflow documentation.
The Refracted Volume is a speculative internal concept study and does not represent a completed project.