


Table of Contents
The evolution of architectural visualization has shifted from simple image-making to a complex simulation of light, atmosphere, and material performance. To master an Architecture Photoshop Workflow, you must move beyond the “beautification” phase and treat post-production as a precision-engineered layer of the design process. In an era where hyper-realism is the baseline, the distinction between a standard render and a winning competition entry lies in the analytical depth of the final composite.
Nuvira Perspective
At Nuvira Space, we view the intersection of real-time rendering and post-production as a critical human-machine synthesis. While high-fidelity engines like Unreal Engine 5or V-Ray provide the raw physics—calculating bounce light, spectral dispersion, and caustic patterns—the Photoshop environment remains the final site of architectural intent. We believe that true visual value is not found in the software alone, but in the analytical bridge between digital simulation and the sensory reality of the built environment. Our lab focuses on streamlining this workflow, ensuring that the heavy lifting of ray-tracing is enhanced, rather than obscured, by the human eye. We advocate for a “BIM-to-Pixel” continuity that respects the structural integrity of the design while elevating its emotional resonance.
Step-by-Step Workflow & Features: The Disruptive Approach
Modern visualization demands a departure from the destructive editing of the past. To achieve professional-grade results, your workflow must be modular, scalable, and non-destructive. The following steps outline a high-performance pipeline used by top-tier visualization studios globally.
1. Intelligence-Driven Layer Management (The Data Foundation)
Efficiency in a studio environment is dictated by file architecture. If a project partner cannot navigate your PSD in under thirty seconds, your workflow is inefficient. This is particularly relevant when coordinating with larger firms following the AIA Best Practices for Digital Delivery, where consistency across project teams is paramount to maintaining a single source of truth from design development through to marketing.
- Render Element Integration: Import your EXR/Render Elements as a stack. Use automated scripts to sort Lighting, Global Illumination, Reflection, Refraction, and Specular passes. This allows you to treat the image as a live 3D scene rather than a flat photograph. By isolating these components, you can adjust the “glossiness” of a floor or the “warmth” of a sunbeam without affecting the rest of the image.
- Linear Workflow (32-bit vs. 16-bit): While 32-bit (Floating Point) offers the highest dynamic range, 16-bit is the professional “sweet spot” for architecture. It avoids the catastrophic banding in gradients—especially in expansive skies or smooth concrete facades—while maintaining manageable file sizes for cloud collaboration.
- Technical Specs:
- File Format: OpenEXR (Multi-layer) to preserve high-dynamic-range data.
- Color Profile: ACEScg (Academy Color Encoding System) for industry-standard color consistency across multiple software platforms.
- Standardized Grouping:
[01_GLOBAL_CC](Final Color Grading, Film Grain, Vignetting)[02_ATMOSPHERE](Z-Depth Fog, Mist, Volumetric Lighting)[03_HUMAN_SCALE](2D/3D Entourage, Vegetation, Urban Life)[04_LIGHT_FX](Bloom, Glare, Emissive Surface Adjustments)[05_BASE_RENDER](Raw passes, Masking ID channels, and Backplates)
2. Global Illumination Refinement and Light-Mixing
The raw render often fails to capture the subtle “light leakage” or “micro-shadows” that define realism. In an advanced Architecture Photoshop Workflow, we don’t just “paint” light; we mix it based on the laws of physics.
- Soft-Light Overlaying for GI Enhancement: Instead of using the “Screen” mode—which can wash out blacks and reduce visual weight—use “Soft Light” with a low-opacity Global Illumination pass. This deepens the “bounce light” effect in interior corners and under overhangs without losing the mid-tone detail.
- Shadow Injection & Rayleigh Scattering: Use the RawShadow pass to selectively mask and cool down the shadows. By using a Cyan/Blue Curves adjustment in the shadows, you mimic the natural Rayleigh scattering seen in Northern European cities like Copenhagen, where the sky’s ambient blue light fills the areas occluded from direct sunlight. This prevents shadows from feeling like “black holes” and gives them a photographic temperature.
- Ray-Tracing Audit: Ensure your render engine settings (Max Bounces) are high enough to capture inter-reflection before bringing the file into Photoshop. If the GI is “splotchy” or exhibits noise, no amount of post-production can fix the underlying data loss. We recommend a minimum of 8 light bounces for complex interiors.
3. Atmospheric Depth through Z-Depth Manipulation
Atmospheric perspective is the primary cue for scale in large-scale architectural projects. Humans perceive distance through the desaturation and cooling of colors as they recede into the distance. Using the Z-Depth pass as a mask rather than a direct overlay allows for surgical precision.
Advanced Z-Depth Workflow
- Inversion Logic: Invert the Z-Depth map so that the background is white (representing 100% atmospheric effect) and the foreground is black (0% effect).
- The “Fog Floor” Level Control: Use a Levels Adjustment on the Z-Depth channel. By sliding the black point, you can prevent the atmospheric haze from touching your primary architectural subject, keeping the foreground crisp while the background recedes into the “urban haze.”
- Lens Physics (Chromatic Aberration): Apply a subtle 0.5px Gaussian Blur to distant planes based on the Z-Depth mask. This simulates a shallow depth of field, pushing the viewer’s eye toward the focal point of the architectural intervention.
4. Material Intelligence: Smart Glass and Specularity
One of the most complex elements in an Architecture Photoshop Workflow Mastery is the representation of glazing. With the rise of Smart Glass Technology, the way glass reflects and transmits light has become a variable design lever rather than a static material choice.
- Refraction Isolation: Use the Refraction pass to adjust the “tint” of the interior. For sustainable designs, showing the heat-reflective properties of the glass through a subtle cyan-gold gradient in the reflections adds technical credibility to the visual narrative.
- Fresnel Effect Correction: Real glass becomes more reflective as the viewing angle becomes more oblique (grazing angles). If your render engine didn’t capture this accurately, use a Fresnel mask to increase reflection intensity on the edges of curved glass curtain walls, ensuring the materiality feels physical rather than digital.
Comparative Analysis: Nuvira Vs. Industry Standard
| Feature | Legacy Industry Standard | Nuvira Disruption |
|---|---|---|
| Masking Strategy | Manual Brush / Lasso (Destructive) | ID-Pass Automasking & Vector Paths |
| Non-Destructive Editing | Destructive (Eraser/Clone Stamp) | Smart Objects & Advanced Layer Masks |
| Lighting Logic | Static Paint-overs (Fake/Intuitive) | Dynamic Light-Mix & Multi-Pass Compositing |
| Asset Fidelity | Low-res 2D Cutouts | High-fidelity 3D-Scanned Silhouettes |
| Data Integrity | 8-bit Flattened JPEGs | 16-bit Multi-channel EXR Workflows |
| Workflow Speed | 4-6 Hours per View | 45-90 Minutes (Logic-based Templates) |
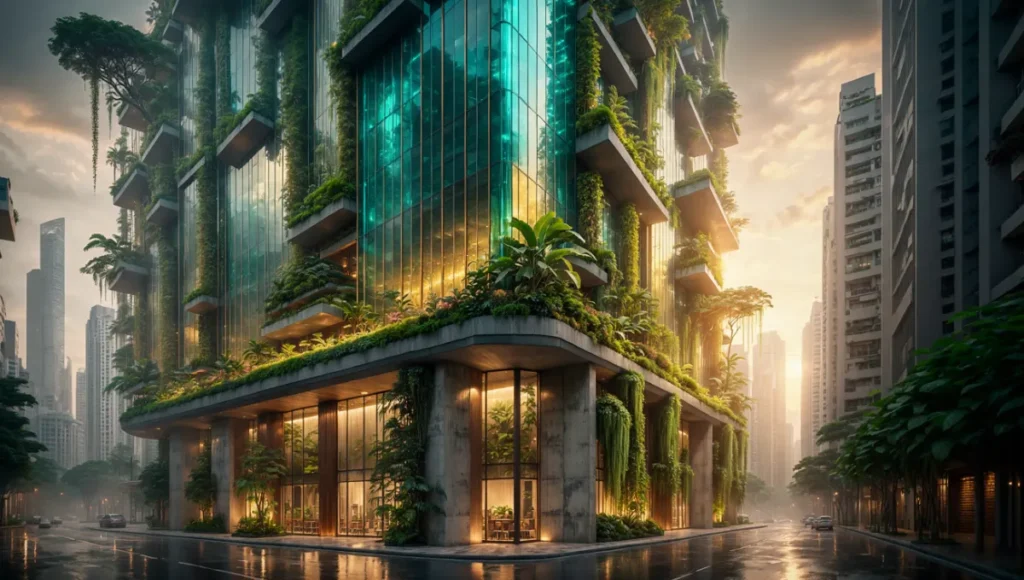
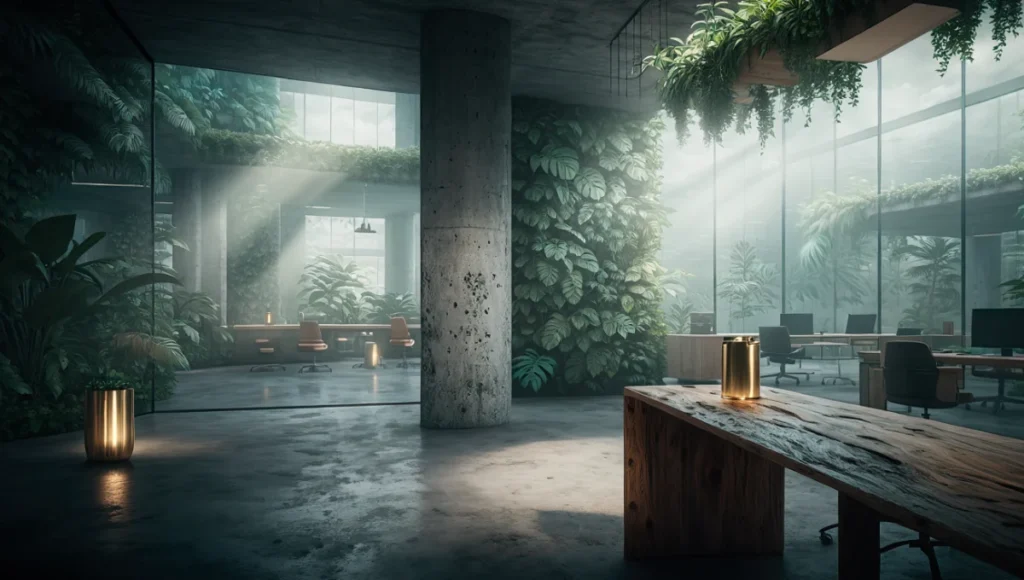
Concept Project Spotlight: Speculative Internal Concept Study “Aethelgard” by Nuvira Space
Project Overview: Location / Typology / Vision
- Location: Singapore (Paya Lebar District).
- Typology: Vertical Biophilic Research Hub.
- Vision: A high-density structure that utilizes passive cooling through advanced glass coating simulations and a Digital Twin monitoring system to optimize energy loads in real-time.
Design Levers Applied
- Specular Bloom Logic: We utilized the Specular pass to highlight the “smart-glass” materiality, applying a 2px Gaussian Blur on a “Linear Dodge (Add)” mode to simulate the intense tropical sun of Singapore.
- Grounding through Site Context: Using high-resolution photography from Singapore’s urban core, we color-matched the asphalt’s specular properties to the building’s reflection, ensuring the structure felt “anchored” to the site.
- Moisture Simulation: To reflect Singapore’s humidity, we introduced a 15% opacity “Noise” layer in the atmosphere group, masked by the Z-Depth pass, to simulate the way light scatters in high-vapor environments.
Transferable Takeaway
Always match the “Black Point” of your architectural render to the “Black Point” of your context photography. Discrepancy in shadow depth and temperature is the most common reason a rendering fails to convince the human eye.
Intellectual Honesty: Hardware Check
An elite Architecture Photoshop Workflow is limited by hardware bottlenecks. Post-production is often where “the computer says no.” For professional files exceeding 5GB with 200+ layers:
- CPU (Clock Speed): Photoshop is historically a single-thread intensive application. While more cores help with background tasks, single-core clock speed is the primary driver of performance. Target Intel i9 or AMD Ryzen 9 chips with boost clocks exceeding 5.2GHz.
- RAM (The Buffer): 64GB is the bare minimum for professional work. We recommend 128GB for 8K rendering compositing to avoid “Scratch Disk Full” errors during critical deadlines.
- Storage: NVMe M.2 SSDs are mandatory. Your scratch disk should be on a separate drive from your OS to maximize data throughput.
The AIA Framework: Documentation and Digital Ethics
In the context of the AIA (American Institute of Architects) Document E203™–2013, Building Information Modeling and Digital Data Exhibit, the “accuracy” of a visualization is becoming a legal and ethical consideration.
- Visual Honesty: As visualization experts, we must balance “marketing” with “technical truth.” Your Photoshop workflow should not hide structural flaws but highlight design solutions.
- Level of Development (LOD): Just as a BIM model has an LOD, a visualization has a “Level of Fidelity.” Our workflow ensures that even at high levels of post-production, the material specs (Reflectivity, VLT – Visible Light Transmittance) remain consistent with the technical data sheets.
2030 Future Projection
By 2030, we predict the “Manual Import” of layers will vanish. Neural bridges between real-time engines and Photoshop will allow for real-time layer updating. We will no longer “export” images; we will live-stream the framebuffer into a compositing environment where AI-assisted masking identifies architectural components (walls, glazing, mullions) based on their BIM data. The Architecture Photoshop Workflow will evolve into a “Live Grading” session, where the designer adjusts light and material performance in a hybrid environment.
Secret Techniques: Advanced User Guide
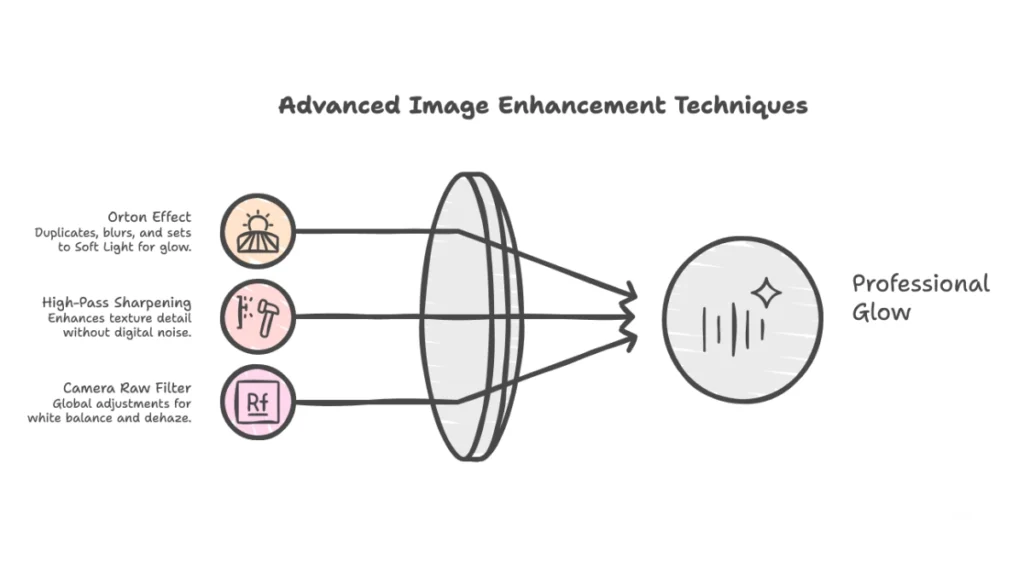
- The “Orton Effect” for Light: Duplicate your final group, apply a Gaussian Blur (radius 40), then set to “Soft Light” at 10% opacity. This creates a professional “glow” that mimics the bloom of high-end camera lenses.
- High-Pass Sharpening: Apply a High Pass filter (1.2 radius) on a “Vivid Light” mode at the end of your stack to pull out the tactile “grain” of concrete or timber textures without introducing digital noise.
- Camera Raw as a Filter: Instead of using individual adjustment layers, use the Camera Raw Filter on a Smart Object of your entire project for global white balance and dehaze adjustments.
Comprehensive Technical FAQ
General Workflow Questions
Q: Why use Smart Objects if they increase file size?
A: Smart Objects are non-destructive wrappers. They allow you to transform and filter assets repeatedly without losing the original pixel data. In a professional studio, this flexibility is worth the extra storage cost.
Q: How do I handle color grading for different displays?
A: Trust the Histogram. Monitors vary, but math does not. Ensure your highlights aren’t clipping and your shadows aren’t “crushed.” We recommend using a calibrated monitor (99% Adobe RGB) for final mastering.
Q: Can I use this workflow for animations?
A: While Photoshop is for stills, the logic of multi-pass compositing carries over to After Effects or DaVinci Resolve. The use of Render Elements is universal across all high-end visualization pipelines.
Enter the Visual Lab
The gap between a “render” and an “architectural vision” is closed in the Visual Lab. Stop painting; start simulating. By mastering these five expert tips, you aren’t just making “pretty pictures”—you are engineering visual narratives that win competitions and secure client buy-in.
Join the Nuvira Collective to access our proprietary automation scripts, EXR-sorting templates, and professional-grade 2D entourage. Let’s build the future, one pixel at a time.