

Table of Contents
The industry is currently witnessing a tectonic shift as Unreal Engine 5 architecture workflows move from the periphery of “experimental tech” to the absolute center of the professional design studio. We are moving away from the era of “overnight bakes” and toward a paradigm where the latency between a creative impulse and its visual realization is effectively zero. This is not merely a faster way to produce an image; it is a fundamental restructuring of the architectural design process itself.
Nuvira Perspective
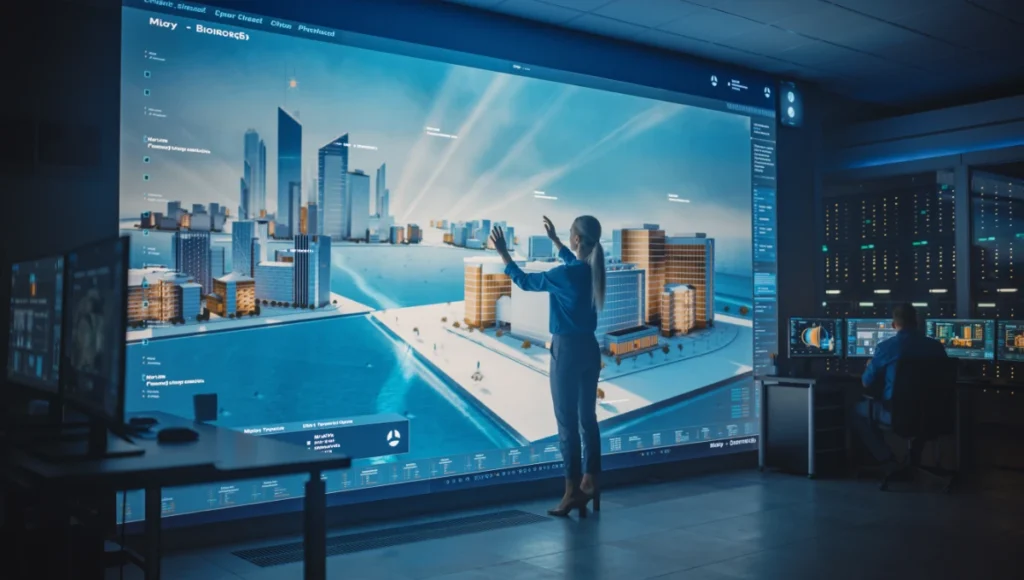
At Nuvira Space, we view the emergence of real-time engines not merely as a software upgrade, but as a fundamental human-machine synthesis. Our philosophy centers on the belief that high-fidelity simulation bridges the chasm between digital intent and architectural reality. By leveraging UE5’s physics-based ecosystems, we are no longer just “drawing” buildings; we are stress-testing the atmospheric and material performance of future environments. We treat the engine as a “Visual Lab”—a sterile yet reactive environment where we can observe how light interacts with matter under precise physical laws. This guide is designed to strip away the inefficiencies of legacy offline rendering and equip you with the analytical tools to master the new standard of spatial simulation.
1. The Death of the Lightmap: Lumen Global Illumination
For decades, architects were held hostage by lightmap UVs and hours of “baking.” Lumen renders this workflow obsolete by providing a dynamic, infinite-bounce global illumination system that reacts in real-time. However, “default” Lumen is often insufficient for high-end archviz.
- Software Ray Tracing vs. Hardware Ray Tracing: In your Project Settings, you must move beyond the “Software Ray Tracing” default. Enable “Support Hardware Ray Tracing” and “Use Hardware Ray Tracing when available.” This allows Lumen to utilize the dedicated RT cores on your RTX GPU to hit-test against actual mesh geometry rather than lower-resolution Signed Distance Fields (SDFs). This is critical for accurate light leakage prevention around thin walls and junctions.
- The Post Process Volume Overhaul: To achieve “Elite” status, your Post Process Volume must be your primary light desk. Push the
Lumen Scene Qualityto 4.0 andFinal Gather Qualityto 4.0. While this increases the GPU cost, it eliminates the “boiling” or “ghosting” artifacts seen when moving the camera through complex interior spaces with small light sources. - Surface Cache Management: Use the “Lumen Scene” view mode to inspect your scene. If objects appear pink or black in this view, Lumen cannot “see” them, meaning they won’t contribute to bounce light. Ensure all your architectural meshes have valid “Distance Field Resolution” (found in the Static Mesh Editor).
2. Nanite for Infinite Context: The Rotterdam Case Study
One of the most profound limitations of legacy workflows was the “Polygon Budget.” With Nanite, that budget is effectively deleted. In a recent urban-scale simulation of the Rotterdam port district, Nuvira Space imported 14 gigabytes of raw photogrammetry data—including weathered concrete docks and industrial machinery—without a single manual optimization step.
- Technical Spec: Preserving Micro-Detail: When working with architectural assets like ornate facades or perforated metal screens, enable
Preserve Areain the Nanite settings. This prevents the “thinning” effect where fine details collapse into noise at distance. - The “Zero-LOD” Workflow: We no longer create Level of Detail (LOD) chains. Instead, we import cinema-quality assets directly from Quixel Megascans or ZBrush. Nanite handles the streaming at the disk level, intelligently deciding which triangles to render based on pixel density. This keeps your VRAM focused on shaders and lighting rather than geometry overhead.
- Nanite Displacement: In UE 5.3 and 5.4, Nanite Displacement allows you to use height maps to generate real geometry at runtime. For an architect, this means a brick wall is no longer a flat plane with a normal map; it is 100,000 individual bricks with real shadows and silhouettes.
3. Path Tracing for the “Ground Truth”
While Lumen is your interactive “design engine,” the UE5 Path Tracer is your “validation engine.” It is a DXR-accelerated progressive renderer that functions similarly to V-Ray or Cycles but operates within the same ecosystem as your real-time scene.
- Command Line Secret: To achieve noise-free results without excessive smearing, use the console command
r.PathTracing.MaxSamples. For final client-ready stills, we set a floor of 2048 to 4096 samples. - Material Fidelity: The Path Tracer is the only way to accurately render refractive caustics through thick glass, crystal chandeliers, or complex liquid surfaces. It respects the physical laws of light transport (energy conservation) in a way that real-time approximations cannot.
- Post-Production in the Engine: By using the Path Tracer in conjunction with the Post Process Volume’s Color Grading (Wheels, Shadows, Midtones), you can perform “look-dev” on a static frame that will perfectly translate back to your Lumen-based animation.
4. The Movie Render Queue (MRQ) Power User Setup
The “High Res Screenshot” button is for amateurs. Professional delivery requires the Movie Render Queue. It allows for “Temporal Sub-sampling,” which is the secret to that “buttery smooth” architectural cinematography seen in high-end studio reels.
- Anti-Aliasing Specs: In the MRQ settings, add the “Anti-Aliasing” tab. Set
Spatial Sample Countto 1 andTemporal Sample Countto 16 or 32. This takes multiple sub-frames and jitters the camera slightly between them, creating a “super-sampled” image that resolves fine lines (like window mullions or suspension cables) that would otherwise flicker. - Console Variable Injection: Add a “Console Variables” tab to your MRQ job. Inject the following for peak fidelity:
r.MotionBlurQuality 4r.Shadow.MaxResolution 4096r.Lumen.SceneLightingQuality 2r.RayTracing.GlobalIllumination.MaxBounces 4
- Tiled Rendering: If you need to render an 8K or 16K image for a physical site hoarding, use the “High Resolution” setting in MRQ to tile the render, allowing you to bypass GPU memory limits.
5. The Sensory Engine: Substrate and Materiality
The “uncanny valley” in architecture often comes from “plastic-looking” materials. UE5’s new Substrate framework (Experimental in 5.4) changes how we define matter.
- Layered Materials: Instead of a single material node, Substrate allows us to layer properties. We can have a base layer of “Polished Concrete” and a top layer of “Dust” or “Water Film,” each with its own refractive index and roughness. This layered approach is ideal for simulating next-generation regenerative materials, such as carbon-negative concrete with embedded biochar and self-healing calcite formations—allowing architects to test long-term aesthetic and performance evolution in real-time.
- Anisotropy: For brushed metal elevators or stainless steel kitchen facades, proper anisotropy settings are vital. This ensures that highlights “stretch” across the grain of the metal, a key visual cue for high-end luxury finishes.
- Refractive Accuracy: For the Rotterdam study, we utilized a “Thin Translucent” shading model for the glass facades, allowing for accurate light tinting without the heavy performance cost of full volumetric glass.
Comparative Analysis: Nuvira Vs. Industry Standard
The disparity between legacy “offline” workflows and the Nuvira Disruptive Workflow is not just about speed; it is about the “Optionality” of the design.
| Feature | Legacy Industry Standard (V-Ray/Corona) | Nuvira UE5 Disruptive Workflow |
|---|---|---|
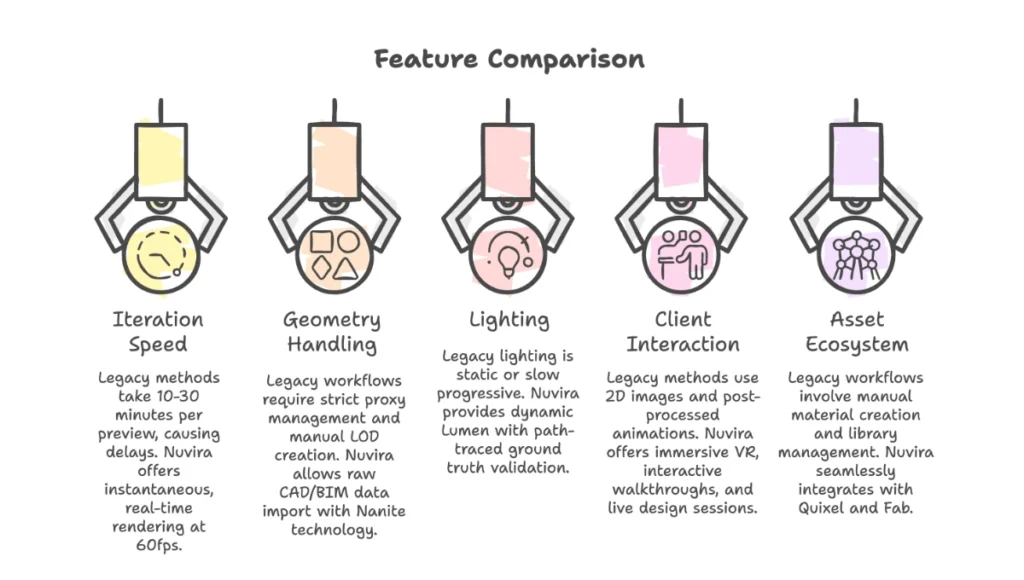
| Iteration Speed | 10–30 mins per low-res preview. Total “Dark Time” during renders. | Instantaneous (60fps real-time). Design happens inside the render. |
| Geometry Handling | Strict proxy management; manual LOD creation; poly-count anxiety. | Nanite-enabled “Infinite Poly” freedom. Raw CAD/BIM data import. |
| Lighting | Static/Baked (non-reactive) or slow Progressive. | Dynamic Lumen + Path Traced Ground Truth validation. |
| Client Interaction | 2D Still Images / Post-processed Animations. | Immersive VR + Interactive Walkthroughs + Live Design Sessions. |
| Asset Ecosystem | Manual material creation and library management. | Seamless integration with Quixel (Megascans) and Fab. |
Concept Project Spotlight: Speculative / Internal Concept Study “Aura Portus” by Nuvira Space
Project Overview
- Location: Rotterdam, Netherlands (Maashaven District)
- Typology: Mixed-Use Hydro-Hub / Research Facility
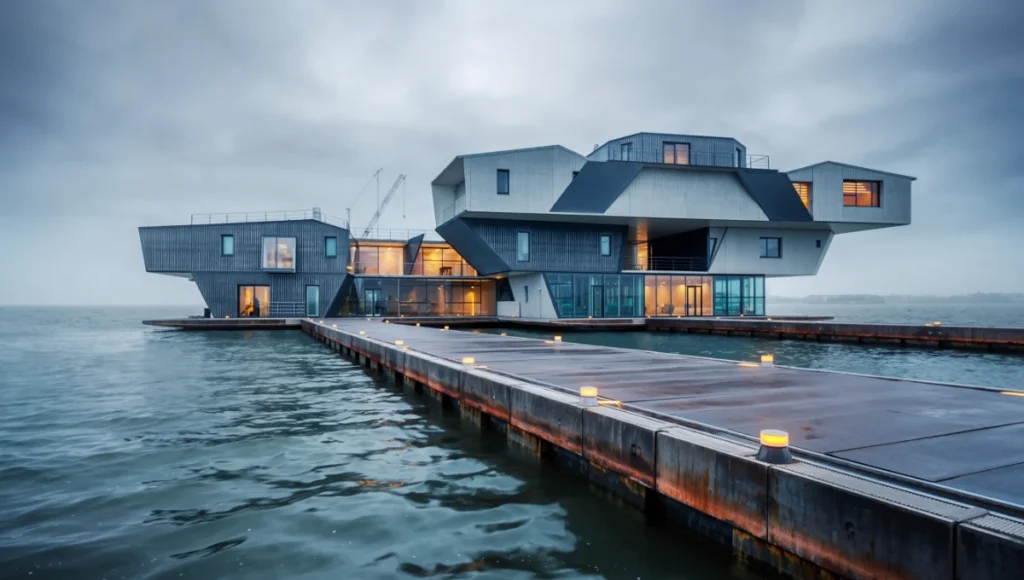
- Vision: An exploration of “Floating Urbanism” that reacts to rising sea levels through modular, kinetic architecture. The project aims to demonstrate how a “living” digital twin can predict the visual and environmental impact of massive maritime structures.
Design Levers Applied
- Dynamic Water Simulation: We bypassed standard “flat” planes for a custom Single Layer Water shader. By using
Distance to Nearest Surfacenodes, we created procedural foam that gathers specifically where the floating modules meet the water line. - Atmospheric Thickness: To capture the damp, North Sea climate, we tuned the
Exponential Height Fogwith a highVolumetric Scattering Intensity. This makes the “Light Shafts” (God Rays) visible as they break through the industrial port’s crane structures. - Technical Spec (Corrosion): We utilized “Runtime Virtual Textures” (RVT) to procedurally apply rust and salt-streaking to the base of the carbon-fiber structures based on their proximity to the water level.
Transferable Takeaway
In professional archviz, the “secret” isn’t in the resolution of your textures; it’s in the Atmospheric Weight. By giving the air volume and the water reaction, you ground the architecture in a specific geographic reality, moving it from “CG” to “Cinema.”
Intellectual Honesty: Hardware Check
UE5 is a massive engine that requires professional-grade hardware. To run the “Elite” settings described in this guide, you must invest in your workstation.
- GPU: The NVIDIA RTX 3090 or 4090 is the baseline for professional work. The 24GB of VRAM is non-negotiable when dealing with 8K textures and complex Nanite clusters.
- CPU: While UE5 is GPU-heavy, shader compilation and Datasmith imports are CPU-intensive. An AMD Threadripper or an Intel i9-14900K is recommended to minimize “down-time.”
- System RAM: 64GB is the bare minimum for urban-scale scenes. If you are running UE5 alongside Revit, Rhino, and Photoshop, 128GB is the optimal “comfort zone.”
- Storage: Always use NVMe M.2 Gen4 or Gen5 drives. Nanite’s “virtualized geometry” relies on the ability to stream data from your hard drive to the GPU instantly. A slow SSD will cause “pop-in” and performance stutters.
2030 Future Projection
By 2030, the “render button” will be a relic of the past. We predict a transition toward Neural Rendering, where Unreal Engine 5 acts as the spatial framework, and AI-denoising kernels generate hyper-realism from low-resolution buffers in real-time.
In this future, the architect will become a “Director of Simulation.” Instead of manually placing lights, you will set the “Atmospheric Parameters” and “Material Age,” and the engine will synthesize a physically accurate environment. Furthermore, with the rise of Vision Pro and similar spatial computing headsets, the “Rendered Image” will be replaced by the “Rendered Experience,” where clients inhabit the digital twin as their primary method of design approval.
Secret Techniques: Advanced User Guide
- Rect Light Barn Doors: For interior design, standard lights spill everywhere. Use the “Barn Doors” settings on a Rect Light to create sharp, controlled “washes” of light on specific walls or artworks, mimicking high-end gallery lighting.
- IES Profiles and Photometric Accuracy: Stop guessing light intensity. Load manufacturer IES files (from brands like Erco or Flos). In the light settings, use “Candelas” or “Lumens” instead of arbitrary “Unitless” numbers. This ensures that if you place a 1000-lumen bulb in the engine, it illuminates the room exactly as it would in reality.
- The Blue Channel Normal Mask: To simulate rain-slicked or worn surfaces, take the Blue channel of your Normal Map (which represents the “up” vector in local space) and use it as a lerp mask for your roughness. This automatically adds “puddles” or “dirt” to the flat tops of surfaces while leaving the vertical sides clean.
- ACES and OCIO: Professional film sets use the ACES color space to ensure consistency from camera to screen. By enabling OpenColorIO (OCIO) in the UE5 Viewport and MRQ, you prevent your highlights from “clipping” into a digital white, maintaining a filmic “roll-off” in bright sunlit areas.
- Virtual Shadow Maps (VSM): For architectural scenes with fine details (like tree leaves or mesh), switch to VSM. It provides much sharper, pixel-perfect shadows compared to traditional shadow maps, though it requires a modern GPU.
Comprehensive Technical FAQ
Q: Why are my shadows flickering in my Unreal Engine 5 architecture walkthrough?
A: This is usually a conflict between Lumen and Virtual Shadow Maps (VSM).
- The Fix: Open the console and type
r.Shadow.Virtual.ResolutionLodBias -1.5. This forces the engine to use higher-resolution shadow pages for fine geometry. Also, check that your meshes have “Affect Distance Field Lighting” enabled.
Q: How do I get crisp vertical lines for architectural photography?
A: Standard cameras in UE5 don’t have a “tilt-shift” lens by default, leading to converging verticals when the camera is tilted up.
- The Fix: In your
CineCameraActor, look for the “Lens Settings.” You can manually adjust the “Sensor Tilt” or use the “Camera Component” -> “Post Process” -> “Lens” -> “Image Effects” to adjust the “Lens Distortion” to a slightly negative value. Alternatively, keep the camera level and use the “Film Offset” (Y-axis) to “shift” the view up without tilting the camera.
Q: My interior is too dark even with Lumen. How do I fix it?
A: Architects often build walls that are too thin.
- The Fix: Ensure your walls have real thickness (at least 200mm). If light isn’t bouncing enough, increase the
Diffuse Boostin the Post Process Volume or add a “SkyLight” with “Real Time Capture” enabled. Avoid placing “fake” invisible lights; instead, increase the “Emissive” strength of your light fixtures and let Lumen do the work.
Q: How do I handle large-scale BIM data (Revit/ArchiCAD) in UE5?
A: Use Datasmith. It is not just a file converter; it is a data-aware bridge.
- Pro Tip: Use the “Datasmith Direct Link” to keep UE5 open alongside your CAD software. Every time you move a wall in Revit, it updates in real-time in Unreal. Use “Visual Dataprep” to create recipes that automatically assign UE5 materials to your Revit categories upon import.
Q: What is the best way to handle foliage for large sites?
A: Use the “Procedural Content Generation” (PCG) framework. Instead of hand-placing thousands of trees, create a PCG graph that samples your landscape and places foliage based on slope, height, or “exclusion zones.” This keeps the scene data-driven and easily editable.
Elevate Your Simulation with Nuvira Space
The transition to Unreal Engine 5 architecture is not optional for the modern studio—it is a survival requirement. The ability to iterate at the speed of thought, to walk a client through a “living” building before a single brick is laid, is the ultimate competitive advantage.
At Nuvira Space, we don’t just provide tutorials; we provide the architectural intelligence required to navigate this new digital frontier. If you are ready to move beyond “pretty pictures” and into the realm of high-fidelity architectural simulation, contact the Nuvira Visual Lab today. Let’s build the future, one frame at a time.