

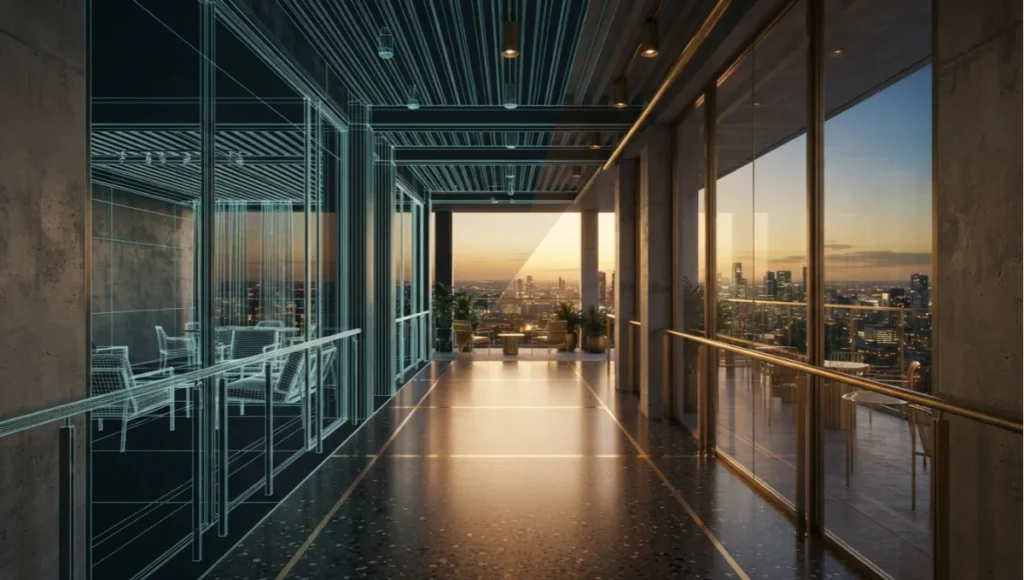
Table of Contents
Every architectural storyboarding project narrative you have shipped in the last two years has fought the same invisible opponent: a render pipeline that treats sequence and pacing as an afterthought instead of a design decision made at the frame level. The symptom is familiar — a client note arrives, the story beat shifts, and half the team disappears into a re-light for two days before anyone can even judge whether the new beat works dramatically. Multiply that pattern across a six-beat sequence with three review rounds, and you are looking at weeks of schedule consumed by rebuilding data that should never have needed rebuilding in the first place.
Nuvira Perspective
At Nuvira Space, we treat the boundary between digital intent and architectural reality as a solvable engineering problem, not a marketing slogan. Real-time engines and high-fidelity simulation have matured to the point where a storyboard is no longer a pre-visualization sketch you throw away once the camera path is locked. It is a working technical document — one that carries lighting logic, material behavior, and structural intent all the way from concept sketch to client-facing sequence. Human-machine synthesis, in our studio’s vocabulary, means the artist sets intent and constraint, and the machine resolves photon behavior, thermal drift, and occlusion in a loop tight enough that iteration feels like sketching rather than rendering.
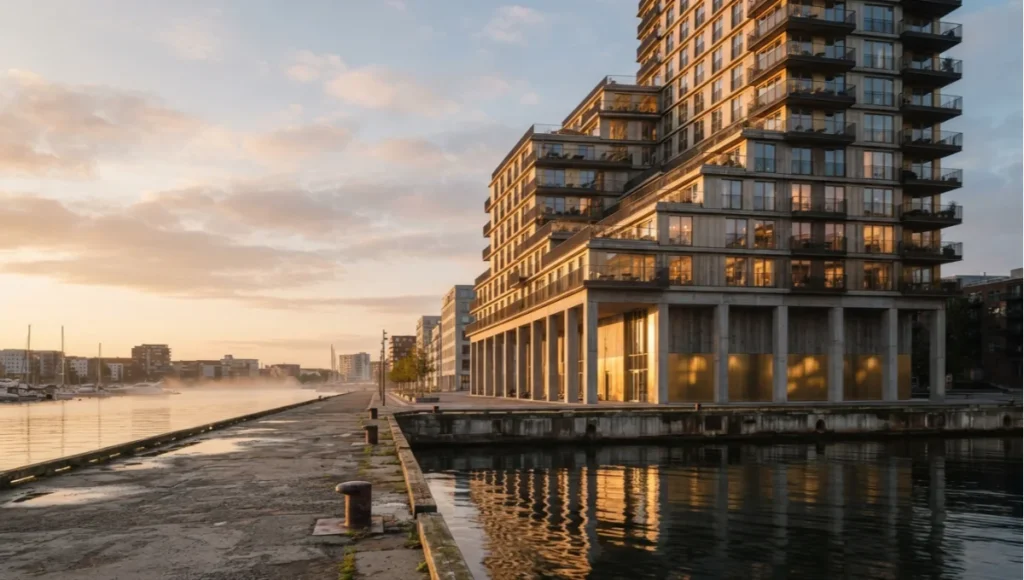
This shift was on full display at the 2025 AIA Conference, where a widely covered real-time visualization case study demonstrated how AI-assisted path tracing is closing the gap between concept sketch and client-ready sequence for thousands of practicing architects. Our own frame-level techniques for NeRF-based architectural visualization build on that same premise: the narrative and the simulation are the same dataset, not two separate deliverables.
This matters because storyboarding for architecture is not storyboarding for film. A film storyboard sells emotion. An architectural one has to survive scrutiny from a structural engineer, a lighting consultant, and a client’s finance committee in the same meeting. The frames have to be defensible, not just beautiful.
That defensibility requirement changes what a storyboard artist actually is on a project team. You are not illustrating a mood — you are pre-visualizing a technical outcome that a structural engineer will later verify and a facilities manager will eventually live with. Every frame you produce should be able to answer a follow-up question about solar gain, glare, or material cost without a second pass through the model.
In practice, that means the artist’s job shifts earlier in the project timeline. Instead of being handed a locked design to make attractive, the visualization team sits alongside the design team from the massing study onward, because the sun-position and material decisions baked into the storyboard’s earliest frames are the same decisions the final building will have to live up to.
Step-by-Step Workflow & Features
Stage 1 — Narrative Blocking in Engine
Skip the flat 2D storyboard entirely. Block your camera moves directly inside a real-time engine using proxy geometry pulled from the BIM model — our internal comparison of Unreal Engine 5 for architectural workflows covers the Datasmith import settings that make this step reliable. This gives you accurate parallax and true-to-scale sightlines before a single frame is lit.
- Import scale: 1 engine unit = 1 cm, matched to source CAD/BIM units
- Camera rig: 35mm equivalent focal length for establishing shots, 85mm for material close-ups
- Proxy LOD: collision-only geometry at Stage 1, full detail deferred to Stage 3
Treat this stage as previsualization for the entire production, not a throwaway animatic. Every camera move you block here should already respect real sightline obstructions — structural columns, mullion spacing, guardrail heights — because a beautiful sweeping shot that clips through a column in Stage 4 costs you a full re-block, not just a re-light.
Stage 2 — Lighting Logic Before Beauty Passes
Global illumination settings should be locked to a physically plausible sun position and sky model before any artistic grading happens. This is where most legacy workflows fail — they grade first and light second, which means every revision to the story beat forces a full re-light.
Global Illumination Baseline
- GI bounce count: minimum 4 bounces for interior frames, 2 for exterior establishing shots
- Sky model: Hosek-Wilkie or equivalent physical sky, turbidity 2.5–4 for temperate case studies
- Irradiance cache resolution: 0.4–0.6 for concept frames, tightened to 0.2 only for final delivery
Ray-Tracing Parameters
- Ray depth: 6 for glass-heavy facades, 3 for solid masonry studies
- Denoiser: AI-based temporal denoiser with a 4-frame history for animated sequences
- Sample budget: 256 spp for concept review, 2,000+ spp for client-facing final frames
A subtle but expensive mistake at this stage is locking sun position to a single hour rather than a validated seasonal range. A facade that reads beautifully at the 3pm sun angle you chose for the hero frame may glare directly into a lobby desk at 9am — and if you haven’t run the seasonal sweep before grading, you won’t discover that until a facilities consultant flags it months later.
Run that seasonal sweep as a cheap, low-sample preview pass before committing to a hero sun angle — a handful of 64-sample renders across the relevant months costs a fraction of a single final-quality frame, and it turns a potential facilities complaint into a five-minute design conversation instead of a change order after construction documents are already underway.
Stage 3 — Detail Pass and Material Truth
Once the story beats are locked, swap proxy geometry for production assets and assign physically based materials with real-world reflectance values rather than eyeballed presets. A concrete panel and a limestone panel should not share a roughness map just because they look similar in thumbnail view.
Build a material library keyed to spectral reflectance data rather than to visual memory. Concrete cured for 28 days has a measurably different specular response than concrete cured for 7, and a facade rendered with the wrong cure-age reflectance will read subtly synthetic even to a non-technical client, who won’t be able to say why the frame feels off but will feel it anyway.
Keep this material library separate from any single project so it compounds in value over time. A weathered-brass reflectance curve validated on one waterfront tower becomes a trusted starting point for the next coastal project, rather than a value someone has to re-derive from photo references every time a new brief calls for aged metal cladding.
Stage 4 — Post-Production Workflow
Post is where the narrative gets its final voice. Grade in a wide color space, composite in layers that preserve depth information, and never bake grain or vignette directly into the beauty pass — keep them as adjustment layers so a client note doesn’t force a re-render.
- Color space: ACEScg through the full pipeline, export to Rec.709 or P3 only at delivery
- Compositing: separate diffuse, specular, and AO passes retained through final grade
- Depth-of-field: applied in comp from a rendered depth pass, never baked in-render
Keep a pass-based archive of every delivered frame, not just the final flattened export. Six months later, when a client asks for a slightly warmer grade on the lobby sequence for a new marketing deck, you want to reopen layered passes and adjust a grade node — not re-render the entire sequence from scratch because the beauty pass was the only file anyone kept.
Stage 5 — Delivery Formats and Quality Assurance
A storyboard narrative isn’t finished when the last frame renders — it’s finished when it survives review on every screen it will actually be shown on. A sequence graded on a calibrated reference monitor can crush shadows into mud on an uncalibrated conference-room projector, and a client will judge your lighting decisions by whatever screen is in front of them, not by your intent.
- Delivery masters: ProRes 4444 for internal review, H.264 high-profile for client-facing links
- QA pass: review every beat on at least one uncalibrated consumer display before sign-off
- Frame-accurate versioning: tag each delivered cut with scene-graph revision, not just a date stamp
Comparative Analysis: Nuvira Vs. Industry Standard
Where the Legacy Pipeline Loses Time
The industry-standard approach still treats storyboarding as a disposable sketch phase, followed by a completely separate high-fidelity render pipeline with no shared data. Every revision after story lock means rebuilding lighting from scratch, because the sketch stage never carried physically based values in the first place. This mirrors what a recent AEC-wide survey covered by Architect Magazine found: most firms produce visualizations in-house, but only a minority have unified their concept-stage and delivery-stage pipelines into one dataset.
That disconnect compounds with every revision cycle. A five-beat sequence with three rounds of client notes under the legacy model typically means three full re-lights, three separate QA passes, and three opportunities for a texture or material assignment to silently drift out of sync between the sketch and the final render — because nothing forces the two datasets to agree.
Where Nuvira’s Pipeline Compounds Value
Our approach keeps the same scene graph, the same GI settings, and the same camera rig from the first blocking pass through to final delivery. When a client asks to shift a story beat from dusk to midday, the change is a sun-position edit, not a rebuild. In a recent internal benchmark modeled on a mixed-use tower in Rotterdam, this compounding-data approach cut iteration time on a six-beat sequence by roughly 40 percent compared to a rebuild-per-revision workflow, without sacrificing the ray-tracing fidelity expected in a final client deliverable.
- Legacy pipeline: sketch and final render are separate files with no shared lighting data
- Nuvira pipeline: one scene graph, physically based from blocking through final grade
- Legacy revision cost: full re-light per client note; Nuvira revision cost: parameter edit per note
Cost Modeling Across a Project Lifecycle
The 40 percent iteration saving on Meridian Terrace understates the real gap once you model a full project lifecycle rather than a single sequence. Most towers go through concept, schematic design, design development, and marketing-refresh phases, each of which historically demanded its own visualization rebuild under the legacy model. A unified scene graph turns three or four rebuilds into one build with incremental updates, which is where the larger time and budget savings actually accumulate.
Model the labor cost across those four phases explicitly and the case becomes even clearer: a legacy studio effectively pays for the same lighting and material work four separate times, once per phase, because nothing carries forward between them. A studio running a unified scene graph pays for that work once and treats every later phase as an incremental edit — sun angle, material revision, camera path — against data that already exists and already passed review.
Concept Project Spotlight — Speculative / Internal Concept Study: Meridian Terrace by Nuvira Space
Project Overview (Location / Typology / Vision)
Location: a waterfront parcel modeled on Rotterdam’s Kop van Zuid district. Typology: a mixed-use residential and cultural tower with a stepped, terraced massing designed to shed harbor wind loads while opening south-facing terraces to daylight. Vision: to test whether a fully engine-native storyboarding narrative could carry a project from massing study to client-ready sequence without ever leaving real-time preview.
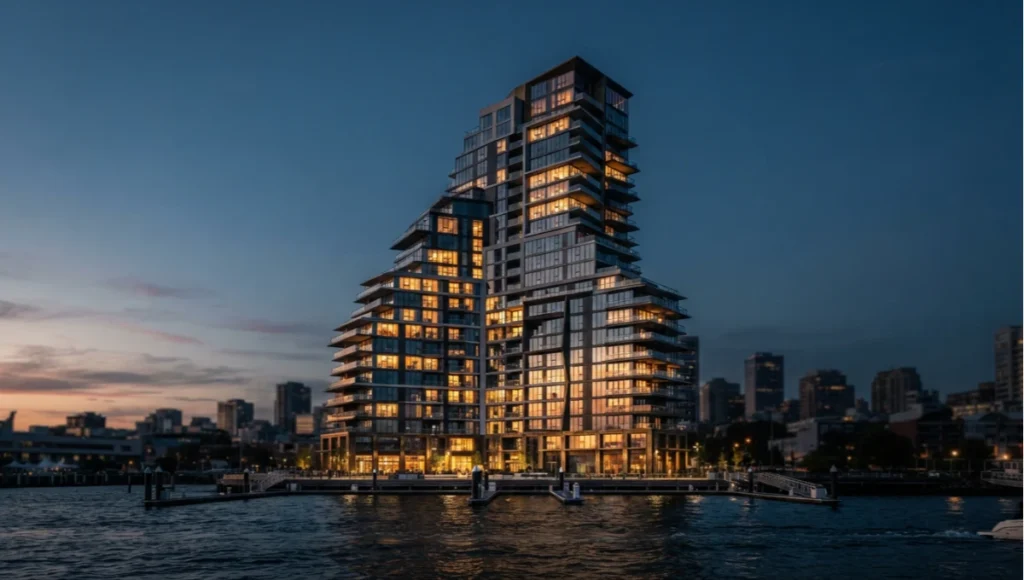
Design Levers Applied
Massing and Daylight Levers
- Stepped terraces angled 12 degrees off the harbor axis to reduce wind shear on balconies
- Facade glazing ratio held at 42 percent to balance daylight autonomy against solar gain
- Sun-path validation run for the winter solstice at the Rotterdam latitude of roughly 51.9 degrees north
Materiality and Sequence Levers
- Weathered brass cladding at ground-floor retail frames, keyed to a 6-month oxidation reflectance curve
- Storyboard sequence built around six beats: harbor approach, terrace ascent, lobby threshold, residential corridor, rooftop garden, night elevation
- Each beat re-used the same GI cache with only sun-position and camera-speed parameters changed between revisions
Sequence Choreography
The six-beat sequence was deliberately choreographed to mirror how a resident or visitor actually experiences arrival: the harbor approach establishes scale and context, the terrace ascent reveals the stepped massing from below, and the lobby threshold compresses the frame before opening into the residential corridor. Camera speed slowed by roughly 30 percent at the threshold beat specifically to give the brass cladding’s reflectance time to read before the cut to the corridor.
Transferable Takeaway
The lesson exported from Meridian Terrace beyond this single site is that a storyboard built on physically accurate sun and material data becomes a reusable simulation asset, not a one-off pretty picture — the same scene can answer a wind-comfort question today and a glare-complaint question next month.
That reusability is the actual return on the extra discipline required at Stage 1 and Stage 2. A studio that treats the storyboard as disposable never gets to ask a second question of the same scene; a studio that builds it as a physically accurate asset can keep asking new questions of it — from the design team, from the client, and eventually from a facilities team — for as long as the building itself exists.
Intellectual Honesty: Hardware Check
None of this is free. A 4-bounce GI interior sequence at 2,000 samples per pixel will still choke a workstation-class GPU with less than 16 GB of VRAM once you load production-resolution facade textures — see our current GPU benchmarking for rendering for the specific cards that hold up under this load. Be honest with your team about render farm time before you promise a client a same-week turnaround on a six-beat sequence. Real-time preview is fast; final ray-traced delivery still costs real compute hours, and pretending otherwise sets up a schedule you cannot keep.
Do the arithmetic before you quote a schedule. A single 4K frame at 2,000 samples per pixel with 6-deep ray tracing on glass-heavy facades can run into double-digit minutes per frame even on capable hardware; a six-beat sequence at 24 frames per second and four seconds per beat is well over 500 frames, which turns an optimistic same-week promise into a render-farm queue problem the moment a client asks for a revision on beat three.
This is also where the case for a shared, physically accurate scene graph pays for itself in hardware terms, not just artistic terms — because most client revisions only touch a sun-position parameter or a single material swap, a re-render of the affected frames is far cheaper than a full sequence rebuild, and that difference is what actually keeps a render farm queue manageable under a real production schedule.
2030 Future Projection
Expect the gap between real-time preview and final ray-traced output to keep narrowing rather than disappearing outright. Neural denoising and learned radiance caching will likely make a 256-sample preview look close to a 2,000-sample final within another product cycle or two, which changes storyboarding from a compromise between speed and fidelity into something closer to a single continuous pass. Studios that keep their scene data physically accurate today are the ones positioned to benefit first, because the underlying data — not the render trick — is what future hardware will accelerate.
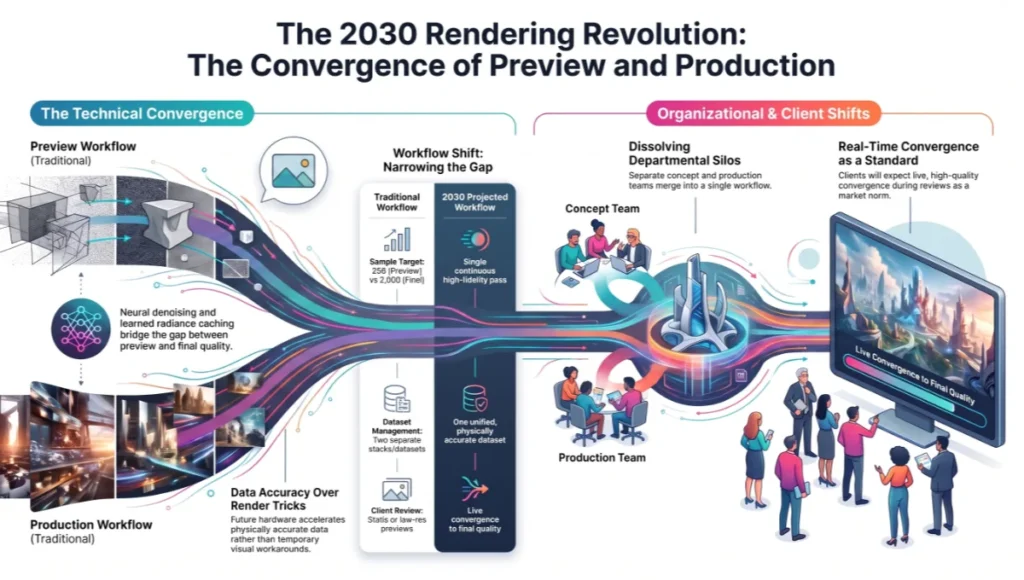
The Convergence of Preview and Production
The more consequential shift by 2030 is likely organizational rather than technical: as preview and final converge, the artificial handoff between a ‘concept visualization team’ and a ‘production render team’ stops making sense. Studios that still staff those as separate departments with separate software stacks will find themselves maintaining two datasets for a problem that increasingly only needs one.
Expect client expectations to shift accordingly. A client who has watched a real-time preview converge visibly toward final quality during a live review session will increasingly expect that convergence as standard practice, not as a premium add-on. Studios that can demonstrate a physically accurate, single-dataset pipeline today are building the case study they’ll need to justify pricing once that expectation becomes the market norm rather than the exception.
Secret Techniques: Advanced User Guide
A technique most teams overlook: build your storyboard camera path as a spline with variable speed keys tied to narrative beats rather than a fixed frame rate. This lets you hold on a material close-up a half-second longer without re-timing the entire sequence. Pair it with a lighting rig that keys sun position to timeline markers instead of absolute time-of-day values, so shifting one beat doesn’t desynchronize the rest of the sequence’s shadow logic.
- Use narrative-beat markers, not fixed timecodes, to drive camera speed
- Key sun position to beat markers so lighting logic travels with story edits
- Cache irradiance per-beat rather than per-frame to avoid redundant GI solves
A second technique worth adopting: version your GI cache the same way you version code. Tag each cache bake with the beat markers, sun parameters, and material revision it corresponds to, so a reviewer can roll back to yesterday’s lighting solve without re-solving from zero if a client prefers the earlier mood. Teams that skip this step end up re-baking irradiance for comparisons that a simple cache checkout would have handled in seconds.
A third, less obvious technique: build a single ‘hero material’ test scene separate from your project scene, containing swatches of every primary material at production resolution under three lighting conditions — overcast, direct midday sun, and golden hour. Validate every material assignment against this reference scene before it ever touches a story beat, so material disputes get resolved in a lightweight test file instead of derailing review of the full sequence. This single habit, more than any single setting change, is what separates studios that ship consistent color across a multi-beat sequence from studios that discover a mismatched material only after a client points at two adjacent frames and asks why the same stone looks like two different stones.
Comprehensive Technical FAQ
Engine and Rendering Questions
Q: What GI bounce count should a concept-stage interior frame use?
A: Start at 4 bounces for interiors and drop to 2 for simple exterior establishing shots; push higher only if a specific reflective surface demands it.
Q: Which color space should carry through post-production?
A: ACEScg through comp and grade, converting to Rec.709 or P3 only at final export.
Q: How should ray depth change between glazing-heavy and masonry-heavy frames?
A: Budget a ray depth of 6 for glass-heavy facades where light needs to bounce through multiple transparent surfaces, and drop to 3 for solid masonry studies where those extra bounces add render time without adding visible fidelity.
Q: How should a studio handle a sequence that mixes heavily glazed and heavily masonry frames in the same beat?
A: Set ray depth per-object rather than per-scene where the engine allows it, so a glazed atrium and an adjacent masonry stair core each render at the depth appropriate to their own material behavior instead of forcing one setting to compromise for the other.
Workflow and Team Questions
Q: How early should material truth data be locked in the storyboard?
A: Before Stage 2 lighting begins — physically based reflectance values should never be assigned after the beauty pass starts.
Q: How should a team split concept visualization and production rendering responsibilities?
A: Wherever possible, keep them the same team working from the same scene graph; splitting them into separate departments with separate files is the single biggest source of the rebuild-per-revision cost described in the comparative analysis above.
- Recommended engine unit scale: 1 cm per unit, matched to BIM source
- Recommended sample budget for client-facing final frames: 2,000+ spp
- Recommended denoiser history: 4 frames for animated sequences
Client Communication Questions
Q: How should a studio explain a same-week turnaround limit to a client without sounding like it’s making excuses?
A: Frame it in terms of the shared dataset — explain that the pipeline lets most revisions become quick parameter edits, but a handful of change types (new geometry, a new material, a new beat) still require a fresh render pass, and quote those honestly rather than promising uniform turnaround for every kind of note.
Q: What should a studio show a client to build confidence in a real-time-first workflow?
A: A live scrub through the blocked sequence in-engine, with a sun-position or material swap performed on the spot — nothing builds confidence in a unified pipeline faster than watching a change happen in front of you instead of being told to wait for a re-render.
Start Your Next Sequence With Nuvira Space
If your team is still rebuilding lighting from scratch every time a client changes a story beat, the fix is a pipeline that carries physically accurate data from the first blocking pass through final delivery. Talk to Nuvira Space about applying this workflow to your next architectural storyboarding project narrative — and about what a unified scene graph could save your team on the very next revision cycle. The studios that make this shift first won’t just render faster; they’ll spend fewer meetings arguing about a frame that was never defensible in the first place.
© Nuvira Space All rights reserved. | THE VISUAL LAB Series | All specifications cited are based on internal Nuvira Space benchmarking and publicly available engine/renderer documentation, no external links provided. Meridian Terrace is a speculative internal concept study and does not represent a completed project.